
You usually don't start thinking about moisture control until the house gives you a reason. Maybe the crawlspace smells earthy every time the AC kicks on, the basement wall feels damp after a storm, or a slab floor sweats in humid weather and leaves a room feeling clammy no matter how low you set the thermostat. Those are the moments when vapor barrier installation stops sounding like a construction term and starts sounding like a fix you need.
The catch is that a vapor barrier is not a universal cure. In the wrong climate zone or the wrong wall assembly, plastic can trap moisture instead of stopping it, which is why the first question should be whether you need a barrier at all, and where it belongs if you do. Building Science guidance draws that line clearly, and the rest of the job comes down to matching the material and placement to the house, not just buying a roll of plastic and hoping for the best. Building Science vapor barrier guidance
Table of Contents
- Why Your Home May Need a Vapor Barrier
- Climate Zones and When a Vapor Barrier Is the Wrong Call
- Choosing the Right Vapor Barrier Material
- Installing a Vapor Barrier in a Crawlspace
- Basement Walls and Under-Slab Placement
- Common Mistakes and How to Troubleshoot a Bad Install
Why Your Home May Need a Vapor Barrier
A homeowner usually starts chasing this problem because the house is telling on itself. The crawlspace smells stale, the basement has that wet-concrete look, or a slab floor feels damp enough to make rugs curl and trim stain. In East Texas, I've seen that smell travel straight into the living room the minute the air handler cycles on, which is a good sign the moisture source is below the floor, not just outside the house.
Moisture gets into a building a few different ways. Ground moisture evaporates upward, damp soil can wick water into masonry, and air leaks move humid air into cooler cavities where condensation forms. A vapor barrier is meant to slow or block that migration, but it only works when the whole assembly is ready for it.
Common Moisture Problems by Location
| Location | Symptom | Vapor Barrier Fix |
|---|---|---|
| Crawlspace | Musty air, wet soil, damp insulation | Seal the ground with polyethylene and tie it into the walls |
| Basement | Damp walls, efflorescence, lingering odor | Use the right wall membrane or interior moisture control system |
| Under-slab | Concrete moisture, flooring failures, slab sweating | Place a barrier under the slab before the pour |
The three places that matter most are crawlspaces, basement walls, and under-slab installations. Each one behaves differently, and each one punishes shortcuts in a different way. If you're still sorting out whether the problem is foundation moisture, ventilation, or drainage, a local contractor's inspection can save you from buying material that won't solve the actual issue. Home Pro's Remodeling & Repairs contractors in Tyler
A vapor barrier can also be the wrong answer if the house needs drying, not sealing. I have crawled under plenty of homes where the actual fix was grading, gutters, or a crawlspace drain path, because plastic over a wet problem only hides it for a while. If you want a local eye on whether your house needs a barrier or a different moisture fix, start with Home Pro's Remodeling & Repairs contractors in Tyler.
Practical rule: if you can smell moisture before you can see it, start by looking below the living space.
Climate Zones and When a Vapor Barrier Is the Wrong Call
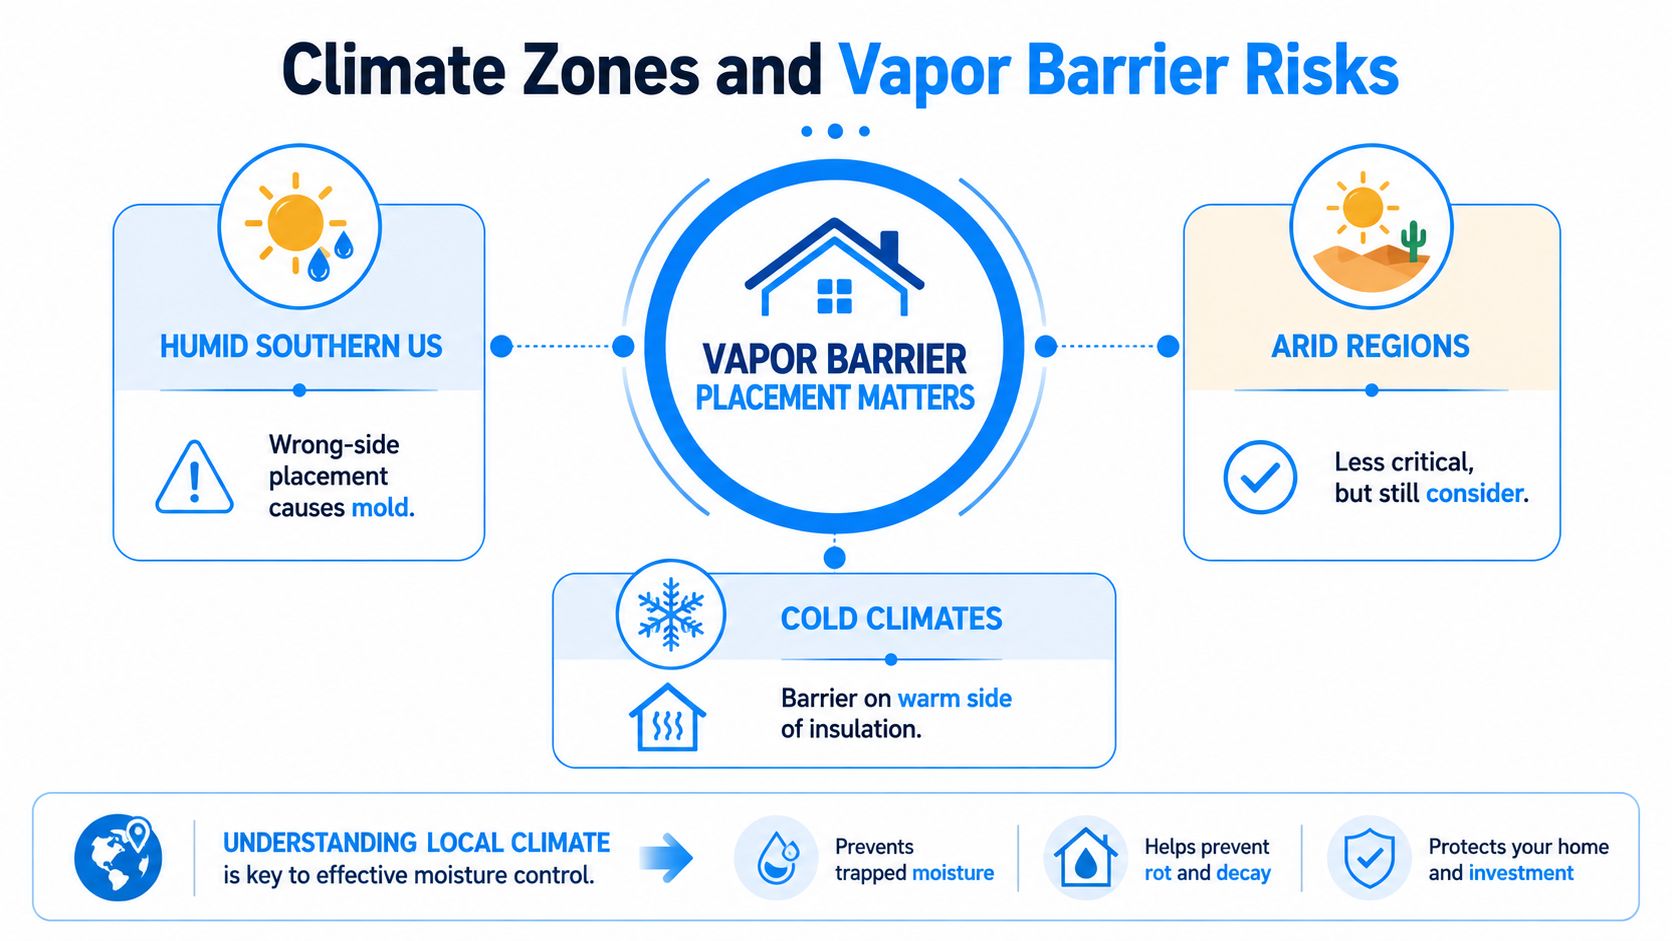
The first thing I tell homeowners in humid parts of Texas is simple, more plastic is not automatically better. In hot, humid climates, a vapor barrier on the wrong side of a wall can trap moisture and make mold more likely, not less. Building Science guidance puts the decision on climate first. In most cold climates, vapor barriers belong on the interior, warm-in-winter side of walls. In hot, humid climates such as the Gulf Coast and Florida, exterior placement is the better fit, and some southern assemblies should skip a vapor barrier altogether. Building Science vapor barrier guidance
A Tyler home does not need the same wall strategy as a Minnesota basement. Cold-climate assemblies are trying to keep indoor vapor from reaching cold surfaces, while hot-humid assemblies are dealing with outdoor humidity pushing inward. That is why the old one-size-fits-all rule fell apart, and why the right answer depends on where the vapor is coming from and where the assembly can dry safely.
The judgment call that saves a project
A double vapor barrier is one of the quickest ways to create a moisture problem you did not have before. If moisture gets trapped between two low-perm layers, the assembly cannot dry, and wood, insulation, and sheathing can stay damp long enough to start degrading. Building Science warns against using a vapor barrier where a vapor retarder or vapor-permeable material would do the job better. Drying potential matters as much as blocking vapor. Building Science vapor barrier guidance
If the wall cannot dry in either direction, the assembly is too tight for the climate.
For crawlspaces, the call is different. Even in humid East Texas, a sealed ground cover often makes sense because the soil is a moisture source, and that source does not care what the weather is doing outside. That is why the floor of a crawlspace often needs a ground vapor barrier even when a wall cavity does not.
If you are not sure whether your project calls for a barrier, a retarder, or no membrane at all, that answer has to come before material shopping. The right call is usually the one that gives the assembly a dry path, not just a tight seal.
Choosing the Right Vapor Barrier Material
Material choice starts with where the membrane will go and what it has to live under. A crawlspace floor, a basement wall, and a shower surround all ask for different products, and mixing those jobs is where a lot of bad installs begin. The main options homeowners run into are polyethylene sheeting, reinforced foil-faced membranes, and fluid-applied or spray-on coatings. Market reports show all three have a place in the residential market, which lines up with what shows up on job sites. MarketIntelO vapor barrier market report
Polyethylene is the familiar roll of plastic, and it still does the heavy lifting on crawlspace floors. A true vapor barrier, in the North American convention, is material with a permeance of less than 1 U.S. perm, about 60 ng/Pa·s·m², which helps separate a real barrier from a lighter vapor-control layer. The trade-off is toughness. 6 mil sheet is common and usually fine where it will not take much abuse, while heavier reinforced products make more sense where the membrane can get punctured or has to stay intact under another layer.
What gets used where
- Polyethylene sheeting: Best for crawlspace floors and simple ground coverage, especially when seams can be taped cleanly.
- Reinforced foil-faced membranes: Better when the surface needs more tear resistance, such as basement wall work with rigid foam or other layers over it.
- Fluid-applied or spray-on coatings: Useful on complicated surfaces, but usually a pro-level choice because surface prep and application matter a lot.
For a crawlspace, I usually want a sheet that is easy to lap, tape, and inspect later. For a basement wall, especially if rigid foam or finish materials are going over it, the membrane needs more tear resistance and better long-term stability. Around showers and bath remodels, the material choice changes again because tile backer, seams, and waterproofing details matter more than raw thickness, which is why a practical shower tile installation guide can be more useful than a generic moisture article.
The short version is simple. Use flexible polyethylene where the membrane is protected and the goal is ground coverage. Step up to a tougher reinforced membrane when the material has to survive traffic, wall attachments, or future finishing layers. Choose a coating only when the geometry makes sheets awkward and the application can be handled cleanly.
Installing a Vapor Barrier in a Crawlspace
Crawlspace work starts before the plastic ever comes out of the box. If there's standing water, bad drainage, or a slope that sends runoff toward the foundation, fix that first. I've pulled back plenty of torn crawlspace liners that were installed beautifully over a wet, muddy mess, and the barrier failed because the foundation problem was ignored.
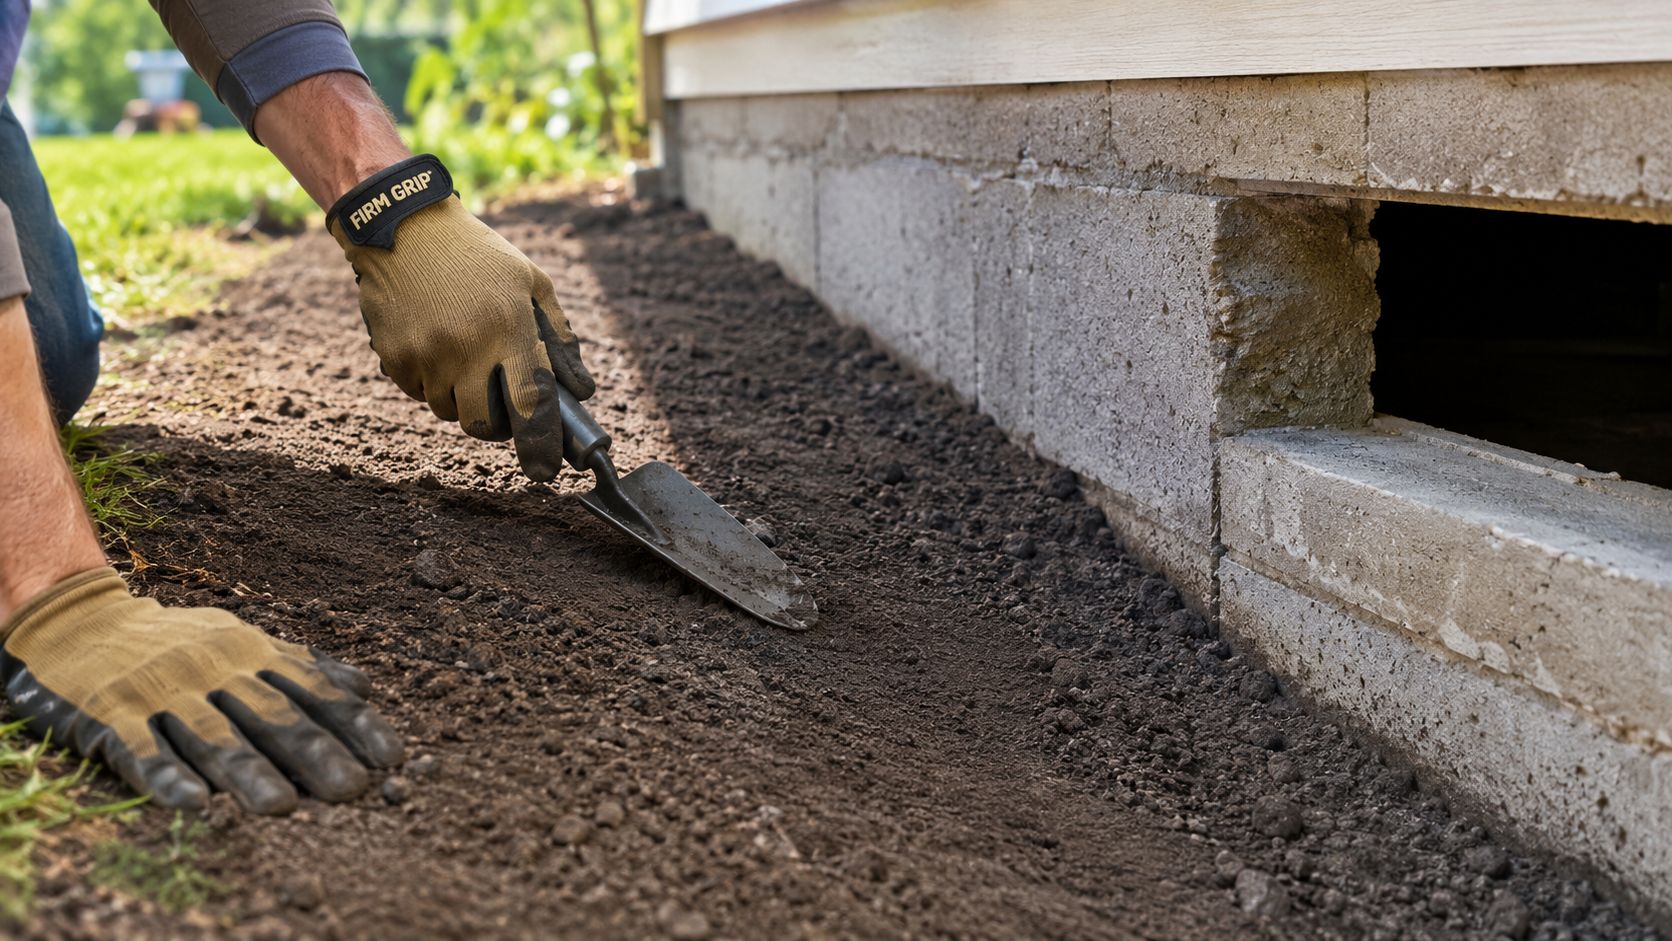
The practical benchmark is to fasten termination tape or fabric tape to the foundation at a steady height, typically at least 3 inches below the top of crawl-space walls, then run the polyethylene sheet up the wall and tie it into that tape. Field guides also call for carrying the membrane about 18 inches up piers or support walls so the floor and wall coverage stay continuous. That continuity matters more than how many square feet you bought, because moisture always finds the seams, edges, and transitions first. Crawl-space vapor barrier installation guide
The sequence that holds up in the field
Start by clearing debris, sharp rocks, old insulation, and anything else that can puncture the sheet. Then unroll the poly, overlap adjacent sheets by at least 6 inches, and many installers use 12 inches to keep the lap reliable if the material shifts later. Clean and dry the membrane before applying manufacturer-approved seam tape or butyl tape, then press the joint with a roller or squeegee so you don't leave air pockets. Polyguard crawl-space vapor barrier installation
Practical rule: if a seam looks busy but isn't compressed, it's not sealed.
A crawlspace is usually where cheaper material makes sense, because the floor is the main target and the membrane isn't carrying finish loads. But the job is physically miserable, dark, tight, and often wet. If access is poor, if you're working around ducts and plumbing, or if you need the space conditioned and sealed as part of a larger repair, a crew can usually do a cleaner job than a DIY weekend run.
The mistake I see most often is a liner where the floor is covered but the edges are left floating. A barrier that isn't tied into the walls and piers is just a tarp on the dirt. It may look finished for a while, then the humidity comes back because the assembly was never fully sealed.
Basement Walls and Under-Slab Placement
Basement wall membrane and under-slab membrane are two different jobs, even if the same truck delivered the roll. On a basement wall, the barrier has to be fastened in place, sealed at the top and bottom, and detailed around every pipe, sleeve, and joint. Under a slab, the barrier sits in the assembly before the concrete pour, and once that slab hardens, every puncture turns into a long-term moisture path.
Basement walls
Basement wall work is about controlling moisture moving through the wall assembly or along its face. The membrane needs clean fastening, overlapped seams, and taped penetrations so the system does not leak around pipe sleeves, fasteners, or joints. If the basement has an interior drain tile or sump setup, the barrier should be detailed so it does not block the drainage route or trap water in a low pocket.
That detail matters more than a lot of homeowners expect. A basement wall can dry one way, take on moisture another way, and still need a barrier that does not fight the drainage plan. If the wall is already showing signs of seepage, the membrane should work with the repair, not cover up a problem that still needs to drain.
Under the slab
Under-slab placement belongs over the gravel capillary break before the concrete pour. The barrier has to stay intact while people walk on it, rebar gets positioned, and concrete is placed, so protection and overlap quality matter more than they do in a crawlspace. One puncture under finished concrete is a serious problem. After the slab cures, the damage is buried, and flooring failures or persistent humidity can show up much later.
The installation logic here is different enough that homeowners should verify local code requirements with the building department before the pour, especially where a capillary break or slab moisture control layer is required. Under-slab membranes are there to keep vapor from migrating into finished space, not to fix drainage problems or standing water.
A contractor handling a full remodel, addition, or interior reconfiguration may already be planning these details as part of the scope. Home Pro's Remodeling & Repairs, for example, lists vapor barrier installation among its services, which fits projects where foundation work and finish work have to line up cleanly. Home Pro's Remodeling & Repairs
A membrane under concrete has one job, stay alive through the pour.
The homeowner takeaway is simple. Basement walls need a membrane that integrates with the wall system, and under-slab work needs a membrane that survives the build process. Same material family, very different failure modes.
Common Mistakes and How to Troubleshoot a Bad Install
The failures I see on service calls usually fall into four buckets. One is a sheet that tore during backfill or crawlspace traffic. Another is seams that pulled apart because the tape stuck to dust, moisture, or a wrinkled lap. A third is wrong-side placement in a climate that needed a different assembly. The last is trapped moisture, usually because the wall cannot dry after the barrier went in.
A crawlspace liner with a rip needs more than a quick patch. Pull the failed section back far enough to get clean overlap, usually about 12 inches beyond the damaged area, then re-lap it with fresh tape on a dry surface. If the problem keeps coming back as puncture damage, the fix is usually tougher material or better site prep, not more tape. On jobs where the installer needs a tighter process from start to finish, a documented quality assurance process helps catch the misses before they turn into callbacks.
What the symptoms usually mean
- Musty smell returning: Moisture is still getting into the space, often through edges or drainage issues.
- White efflorescence on basement walls: Water is moving through masonry and leaving mineral salts behind.
- Visible condensation after install: The assembly is holding moisture where it cannot dry.
- Seams separating: The tape failed, the surface was dirty, or the membrane shifted after installation.
Wrong-side placement needs a more careful correction. If a wall in a mixed-humid or hot-humid climate was sealed too aggressively, a vapor-retarder paint or a more permeable assembly can be the better repair than forcing the wall to act like a cold-climate basement. Climate and drying potential matter more than product labels, and the Building Science guidance on vapor barriers lays out that trade-off clearly.
Before touching a roll of plastic, ask three questions. Is the drainage right, is the climate zone compatible with the assembly, and is moisture coming from the ground or from the air? Those answers keep a lot of callbacks from turning into demolition.
If you are diagnosing a bad install in a crawlspace, basement, or under-slab area, that same order of inspection applies. Check the water source first, then the assembly, then the details at seams, edges, and penetrations. Most failures are plain old workmanship problems, but the wrong assembly choice can make a decent install fail anyway.