
You're standing in the garage, looking at boxes, an old freezer, and a concrete floor that could become a bedroom, office, gym, or small apartment. The space feels like free square footage because the walls and roof are already there. That assumption is where many homeowners get into trouble.
A garage conversion to living space isn't mainly a flooring or drywall project. It's a change from unoccupied storage to an occupied part of the home. That shift can trigger requirements for insulation, heating and cooling, emergency escape, electrical work, fire separation, permits, and inspections before you ever choose paint.
The practical approach is simple. Decide whether giving up the garage makes sense, choose a full or partial scope, verify the local approval path, then design the thermal and mechanical systems before finishes. This guide walks through that decision in the order that protects your budget.
Table of Contents
- Why a Garage Conversion Is a Change of Occupancy, Not a Remodel
- Full Versus Partial Conversion and How to Decide
- Permits, Zoning, and the ADU Pathway Explained
- Insulation, HVAC, and the Thermal Envelope
- Realistic 2026 Cost Ranges and What Drives Them
- When to Hire a Contractor and What Design-Build Solves
- Phased Checklist, Timeline, and Common Questions
Why a Garage Conversion Is a Change of Occupancy, Not a Remodel
A garage can look finished and still fail as living space. The moment you add a bed, sofa, desk, or tenant, you're no longer treating the room as storage. You're asking the building department to recognize it as an occupied, conditioned area that must protect people from weather, fire, moisture, poor ventilation, and unsafe exits.
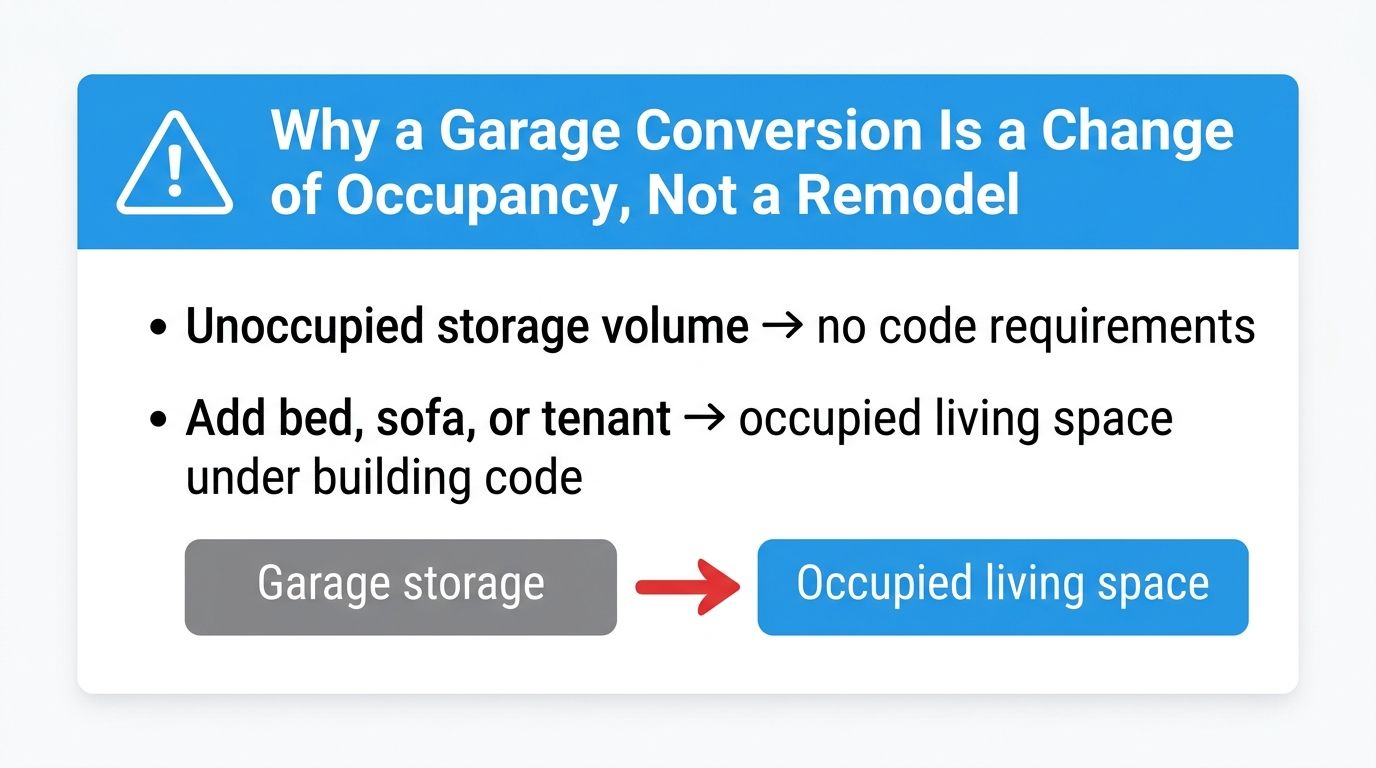
That classification drives the work. A slab that was acceptable for parking may need review as a finished floor. A wall beside the house may require proper drywall and fire protection. Sleeping rooms need a compliant emergency escape opening, and the room needs a heating system capable of maintaining required temperatures. Smoke and carbon monoxide detection may also need to connect to the home's electrical system, depending on local rules.
Start with four decisions
Decide whether occupancy is right. If you need a legal bedroom, office, guest room, or rental unit, treat the project as habitable space from the first sketch.
Choose the scope. A full conversion commits the bay to conditioned living area. A partial conversion preserves some garage function but may not qualify as legal living space.
Clear zoning and permits. Local rules determine setbacks, parking, lot coverage, ADU eligibility, and the documents required for approval. Resources covering land use changes and related planning issues can help you understand the broader regulatory context, but your local planning and building offices control the decision.
Build the envelope before the finishes. Insulation, air sealing, ventilation, windows, HVAC, and slab treatment determine whether the room stays comfortable. Flooring and cabinets come after those decisions.
Practical rule: If your plan includes sleeping, renting, or calling the room a bedroom, don't start with drywall. Start with a permit conversation.
The common DIY failure is finishing the interior first and discovering that the ceiling height, window openings, floor assembly, electrical service, or fire separation doesn't meet the new use. At that point, the attractive work may need to be removed. A garage conversion is a remodel only after it has been designed and approved as living space.
Full Versus Partial Conversion and How to Decide
Full and partial conversions solve different problems. A full conversion removes the garage door, infills the opening with a properly framed exterior wall, and commits the entire bay to conditioned space. That makes sense when the house needs a bedroom, dedicated office, family room, or lawful ADU.
A partial conversion keeps the garage door and reserves some area for parking, tools, storage, or equipment. The finished portion can work well as a gym, workshop, or flex room, but keeping the garage door often limits whether the area can be approved as permanent living space. Before planning built-ins, review practical layout inspiration such as these two-car garage ideas for Utah, then apply the same space audit to your own property.
The parking decision deserves an honest test. UK evidence found that 51% of households with a garage rarely or never park a car inside, while 16% had converted the garage to liveable space, according to 2024 garage-use coverage. That suggests many garages are underused for vehicles, but it doesn't mean every owner should remove one. Storage, weather protection, resale expectations, and future vehicle needs still matter.
Count actual use over a month. Then ask whether the property can absorb the lost storage and whether local rules require replacement parking.
| Factor | Full Conversion | Partial Conversion |
|---|---|---|
| Primary use | Bedroom, office, family room, or ADU | Gym, workshop, storage, or flex area |
| Garage door | Usually removed and replaced with a framed wall or approved opening | Usually retained |
| Living-space approval | More suitable for legal habitable space | Often limited by the remaining garage function |
| Parking and storage | Lost or substantially reduced | Preserved in part |
| Best fit | The household needs permanent, conditioned rooms | The household needs flexibility more than another full room |
Check four conditions before committing:
- Daily parking need: If the car goes inside regularly, full conversion may create an everyday problem.
- Lot and zoning limits: Added wall area, windows, or an ADU may affect lot coverage and setbacks.
- Ceiling height: Measure from the existing slab to the lowest obstruction. A raised floor can reduce usable height.
- Intended advertising: If you'll advertise a bedroom or rental unit, design for permits and inspection, not informal use.
The rule is straightforward: if anyone will sleep there, plan a full conversion and permits. A flex room can remain flexible, but a bedroom creates a higher safety and compliance burden.
Permits, Zoning, and the ADU Pathway Explained
A garage conversion can fail before construction starts if the property cannot support the proposed use. Go to the planning desk before choosing flooring or ordering drywall. Confirm that the garage may become habitable space, then design around the approval requirements.
Follow the approval sequence
First, verify local zoning. Ask about setbacks, lot coverage, parking replacement, occupancy limits, and whether an ADU is allowed on your parcel. An attached garage and a detached garage may follow different rules, so get the answer for your specific property.
Next, document the existing structure. Measure ceiling height, door and window locations, slab elevation, foundation edges, utility routes, and the garage's connection to the main house. If you remove the garage door, the plans must show the replacement wall assembly and any structural changes.
Then, prepare the permit package. Depending on the jurisdiction, it may need a floor plan, structural notes, electrical and plumbing layouts, energy compliance documents, and details for insulation, ventilation, windows, and fire separation. California provides a clear ADU example. State guidance generally treats qualifying garage-conversion ADUs as ministerial applications with a 60-day review clock for complete applications, as described in this garage conversion permit requirements guide. Los Angeles County guidance describes a garage-conversion ADU as space converted from an existing single garage or storage building, with a possible size under 1,200 square feet. State guidance also allows up to 150 square feet of added area for entry and exit. Those provisions are California-specific. Your local building department controls your project.
Finally, wait for permit issuance before construction. Plans, energy documents, and inspections define what the builder installs and what the inspector verifies. Starting early can force you to remove finished work or correct concealed defects.

Expect questions about the existing shell
Garage slabs often sit lower than the house floor, and older construction may lack details required for living space. The reviewer may request information about moisture control, footing conditions, ceiling height, insulation, egress, electrical panels, or parking. Gather those measurements before the designer completes the drawings.
A legal conversion must bring the structure up to current code for its new use and pass inspection before approval, as required by local building codes governing habitable-space conversions. For a related example of how permit questions can change remodeling scope, review this guide on whether a kitchen remodel needs a permit.
Watch for these rejection points:
- Low finished ceiling: A floor build-up or ductwork can make marginal height unacceptable.
- Poor emergency escape: A sleeping room needs a correctly sized egress opening and an accessible path.
- Unpermitted electrical work: Existing panels, outlets, and circuits may not support the new load.
- Missing fire separation: Shared walls, ceilings, and openings may need rated assemblies.
- Parking conflicts: Some locations require replacement parking or restrict removal of covered spaces.
The review period starts with a complete application. Missing drawings or technical details create delays before the clock meaningfully begins.
Use the planning office, building department, and utility providers as early checkpoints. That sequence keeps the project tied to what the property can legally support before insulation, mechanical work, and finishes drive the budget.
Insulation, HVAC, and the Thermal Envelope
A garage usually starts as a hot, cold, damp box. Finishes won't fix that. Build the thermal envelope first, then select HVAC, then close the walls.
Seal the shell before choosing finishes
Begin by documenting the existing slab, walls, ceiling, roof framing, garage-door opening, and exterior penetrations. The conditioned envelope should include insulation and air sealing at the floor, walls, and ceiling, with the attic above the converted area addressed as part of the assembly. One municipal conversion guide specifies R-60 attic insulation and ventilation at 1 square foot of net vent area per 150 square feet of attic area, or 1:300 when 40% to 50% of the vents are within 3 feet vertically of the ridge, as shown in this municipal garage-conversion guide.
Don't bury the attic ventilation under insulation. Without a planned air path, moisture can accumulate and condensation can damage the assembly. For practical roof work, this guide to easy garage roof insulation offers useful installation context, but your permit drawings and climate requirements still control.
A reliable sequence looks like this:
- Confirm openings and elevations. Size windows and exterior doors before framing closes.
- Address water and air movement. Repair leaks, seal penetrations, and establish the weather barrier.
- Insulate the slab, walls, ceiling, and attic. Choose the assembly based on local code and available depth.
- Select HVAC and ventilation. Match the equipment to the sealed, insulated room.
- Close the walls only after rough inspections. Insulation and drywall should follow approval of the hidden work.
Plan windows and mechanical systems together
Habitable rooms generally need windows or skylights equal to at least 8% of floor area, with an openable area of at least 4% for natural ventilation unless mechanical ventilation is provided, according to this IRC-based requirements summary. That means window size affects both code and heating and cooling loads. Oversized glass may improve daylight while increasing equipment demands and summer heat gain.
Wall insulation commonly starts at R-13, while ceiling requirements can range from roughly R-19 to R-49 or higher by climate zone, according to the same requirements summary. In East Texas, don't treat the garage ceiling like an interior partition. Humidity control, air sealing, and properly sized cooling matter as much as nominal insulation values.
For the slab, decide whether a sealed concrete floor with area rugs meets the comfort target or whether a floating subfloor is justified. A raised assembly can improve comfort, but it consumes ceiling height and requires careful moisture detailing. Review vapor barrier installation guidance before covering the slab.
Mini-split heat pumps suit many conversions because they avoid major ductwork. Extending an existing furnace can work when the equipment and duct capacity support the added room, while a ducted air handler may make more sense for a larger ADU. Have the mechanical design confirm required ventilation rates instead of assuming a wall-mounted unit solves every air-quality issue.
Realistic 2026 Cost Ranges and What Drives Them
A garage conversion budget has two very different starting points. A simple project may involve finishes in an already-permitted, serviceable shell. A full ADU may require new plumbing, electrical capacity, HVAC, insulation, fire separation, windows, accessibility details, and extensive plan review.
Independent 2026 guidance places simpler projects at about $6,000 to $27,400, while full conversions can reach $50,000 or more and full ADU-style work can reach $100,000 to $175,000, as outlined by Angi's garage-conversion cost guidance. Those figures are broad because the starting condition matters more than the room's final paint color.
What creates the jump
A basic finish package may include patching, paint, flooring, lighting, and storage. It assumes the shell, permits, electrical service, insulation, HVAC, and floor condition already work.
The mid-range room usually adds a new insulated envelope, HVAC, windows or doors, electrical circuits, drywall, and better finish carpentry. A bedroom or office can land here when plumbing isn't involved and the existing structure needs limited correction.
A full ADU adds a bathroom, kitchen or kitchenette, separate entry, plumbing distribution, drainage, service capacity, life-safety components, and more detailed design. Sewer tie-ins and slab cutting can change the estimate quickly.
| Line Item | Basic Finish ($6K–$15K) | Mid-Range Room ($25K–$55K) | Full ADU ($100K–$175K) |
|---|---|---|---|
| Structure and slab | Minimal repair | Selective correction | Possible slab work and structural upgrades |
| Thermal envelope | Existing or limited finish | Full insulation and air sealing | Full code-driven assembly |
| HVAC | Existing conditioning assumed | Mini-split or duct extension | Dedicated, designed system |
| Electrical | Finish outlets and lighting | New circuits or panel work | Service, kitchen, bath, and exterior requirements |
| Plumbing | None | Limited utility work | Bathroom, kitchen, drainage, and sewer connections |
| Openings and fire safety | Existing openings | Egress and separation upgrades | Egress, separation, entry, and ADU requirements |
| Finishes | Basic flooring and paint | Durable room finishes | Complete dwelling finishes |
A 400-square-foot example can fall into any of these tiers. At the basic level, the work may be mostly cosmetic. At the middle tier, the same area may need insulation, HVAC, windows, electrical, and inspection-driven corrections. At the ADU tier, the footprint itself isn't the expensive part. Utility distribution and code compliance are.
Owners often underestimate structural reinforcement for a second-story addition, a service-panel upgrade to 200 amp, sewer connections, and accessibility work when the unit will be rented. Design and permit soft costs commonly run 10% to 20%, and a 15% contingency is a sensible planning allowance, based on the cost guidance above. Treat those as budgeting rules, not guaranteed bids. Local labor, site access, utility distance, and the existing shell can move the final price substantially.
When to Hire a Contractor and What Design-Build Solves
DIY is reasonable for removable shelving, painting, cabinet assembly, and some finish work after the permitted scope is complete. It's the wrong place to learn structural framing, service-panel work, plumbing drainage, fire-rated assemblies, or HVAC sizing.
Use this test before picking up a tool:
- Licensed trade involved: Hire the properly licensed electrician, plumber, or HVAC professional.
- Permit required: Hire someone who understands the application, inspections, and closeout.
- Load path changed: Hire a contractor and structural professional before removing walls or altering headers.
- Hidden work covered: Don't let anyone close insulation, wiring, plumbing, or fire separation before rough inspection.
- Your schedule is tight: Hire out the coordination if missed inspections or delayed materials would disrupt your household.
What design-build actually buys
A design-build contractor can coordinate measured drawings, structural input, permit documents, trade layouts, material selections, inspections, and construction under one managed process. That matters because garage conversions combine several systems in a small footprint. A window placed for daylight may conflict with a shear wall, a duct route, an egress requirement, or a plumbing wall.
Ask for four concrete deliverables:
- A feasibility opinion: Can the slab, ceiling, openings, utilities, and zoning support the intended use?
- A code-aware design: Does the plan show egress, insulation, ventilation, fire separation, and access?
- A coordinated rough-in plan: Are electrical, plumbing, HVAC, and framing designed together?
- A written proposal: Does it separate allowances, exclusions, permit costs, and change-order procedures?
The right contractor should visit the site before pricing the job. A quote based only on photos can miss slab elevations, panel location, drainage depth, roof framing, and access constraints.
A low bid that skips permits isn't a savings plan. It's a deferred demolition bill.
Look for a licensed and insured firm with a clear process, written communication, and a defined inspection schedule. Avoid contractors who promise to “handle it later,” waive change orders verbally, or refuse to identify who pulls the permit. For a project that changes occupancy, accountability matters more than a flashy finish package.
Phased Checklist, Timeline, and Common Questions
A workable conversion follows five phases. The full process commonly takes 8 to 16 weeks, depending on design complexity, permit review, material availability, inspections, and utility work.
Use this five-phase checklist
1. Feasibility: Measure the garage, record ceiling height and slab conditions, photograph utilities, and confirm zoning, parking, setbacks, lot coverage, and intended occupancy.
2. Design: Produce the floor plan, opening schedule, structural notes, insulation details, HVAC approach, electrical layout, plumbing plan, and finish selections. Set a target budget before ordering materials.
3. Permitting: Submit complete documents, answer plan-review comments, obtain approval, and schedule utility coordination. Don't assume a review clock starts for an incomplete application.
4. Construction: Complete demolition, framing, structural work, windows and doors, MEP rough-ins, inspections, insulation, air sealing, drywall, flooring, cabinets, fixtures, and paint in that order.
5. Closeout: Finish trim and testing, correct punch-list items, pass final inspections, and obtain the certificate of occupancy or other required approval.
The bottlenecks are usually plan-review backlog, utility coordination, and inspection sequencing. Rough-in inspections must happen before walls close, and final approval depends on the inspector seeing the completed life-safety and mechanical work.
For comparison, a broader guide on how long a home addition takes can help you set expectations for projects with similar design and inspection coordination.
Questions homeowners ask
Can the garage door stay? It can remain for a flex or workshop use, but a legal bedroom or ADU usually needs a compliant exterior wall or approved opening strategy. Have the designer confirm the use before you preserve the door.
Will the electrical service need an upgrade? Not every project needs one. The electrician should calculate the existing load and account for HVAC, kitchen appliances, water heating, lighting, and general-use circuits.
What if the ceiling is too low? Measure before choosing a floating floor or ducted HVAC. A thinner floor assembly, alternate equipment, or structural correction may be necessary, but the building department makes the final determination.
Does financing use the post-conversion value? Lenders and appraisers may require approved plans, permits, and documented finished area before recognizing the new space. Ask your lender before construction.
Will taxes change? A permitted addition of habitable area can affect property assessment, but the outcome depends on the local assessor and the project's recorded status. Ask the assessor's office directly.
Home Pro's Remodeling & Repairs offers design-build remodeling, garage transformations, additions, and repair services for homeowners across Tyler and East Texas, with onsite consultations, estimates, and permit-aware project coordination. If you're considering a garage conversion to living space, visit Home Pro's Remodeling & Repairs to schedule a site evaluation and discuss a realistic scope before construction begins.