
You're tired of the bathroom door bumping the vanity, or the bedroom door blocking the spot where a dresser ought to fit. A pocket door looks like the obvious fix until you start measuring the wall and realize the door needs somewhere to go.
The success of pocket door installation depends less on the trim than on the opening and the hardware hidden behind it. Get those decisions right, and you can build a door that slides easily, stays aligned, and remains practical if someone in the household eventually needs a walker or wheelchair.
Table of Contents
- Rough Opening Sizes to Plan Before You Frame
- Pocket Door Types, Tools and Materials to Gather
- How to Frame the Pocket and Hang the Track
- How to Hang the Door and Finish the Drywall and Trim
- Common Installation Mistakes and How to Fix Them
- What Pocket Door Installation Costs and When to Hire a Pro
- Accessibility Trade-offs and Your Next Step
Rough Opening Sizes to Plan Before You Frame
The rough opening sets the project's size, not the visible doorway. For preliminary planning, the Dunbarton rough-opening guide supports the typical single-pocket-door calculation of approximately twice the nominal door width plus 1 inch for jamb and shim space.
That extra wall opening contains both the passage and the concealed pocket. The panel has to slide out of the passage without running into framing, while the carriage and edge treatment need their specified clearance.
Preliminary opening dimensions
The widths below are calculated using that planning formula. Height must come from the selected kit's drawing because track and hanger arrangements aren't interchangeable.
Rough opening sizes for common single pocket doors
| Nominal door width | Rough opening width | Rough opening height |
|---|---|---|
| 24 inches | 49 inches | Door height plus kit-specified header allowance |
| 28 inches | 57 inches | Door height plus kit-specified header allowance |
| 30 inches | 61 inches | Door height plus kit-specified header allowance |
| 32 inches | 65 inches | Door height plus kit-specified header allowance |
| 36 inches | 73 inches | Door height plus kit-specified header allowance |
Say you're planning a door and discover that the framed width equals only twice the slab width. Under the usual formula, you've left out the jamb and shim allowance. Don't order the kit hoping thinner trim will recover it. Correct the framing dimensions first.
Measure height from the reference surface specified in the instructions, and account for the finished flooring. A slab that clears an unfinished subfloor may scrape once the tile, underlayment, or wood flooring goes down.
Practical rule: Write the selected kit's final width, height, and floor reference directly on the framing plan before anyone cuts a stud.
Check the wall before committing
Mark the entire pocket, not just the doorway. Check for wiring, plumbing, ductwork, nearby corners, and fixtures that would require fastening into that wall later.
If the wall can't provide a clear pocket, compare another configuration before demolition. A French door installation requires swing clearance but may avoid rebuilding a long section of wall.
Treat preliminary measurements as a feasibility check. Final ordering should wait until you've confirmed the kit drawing, the actual slab thickness, and the hardware capacity.
Pocket Door Types, Tools and Materials to Gather
Choose the door arrangement before buying the frame. A single pocket door disappears into an adjacent cavity. A conventional double pocket-door arrangement uses opposing panels that retract into separate pockets; telescoping systems can stack panels toward the same side but need purpose-built hardware.
A retrofit kit doesn't eliminate the need to open an existing wall. It packages the frame components, but you still need access to install them and deal with anything occupying the cavity.
Match the wall, slab, and rollers
Start with the wall structure, not its finished thickness. Drywall doesn't provide usable pocket depth, and a bowed wall can reduce clearance even when the nominal framing size looks suitable.
The specifications summarized in Fine Homebuilding's pocket-door installation reference include a standard-duty system for 3.5-inch wall framing, with a maximum door size of 36 by 80 inches and a capacity of 125 pounds per door, alongside another hardware example rated for doors up to 176 pounds.
Those are product limits, not universal allowances. Check the actual slab weight on its product sheet, including glazing or other substantial additions. A solid-core door may feel better and reduce sound transmission through the panel, but it also increases the load on the hangers and header.
Buy the frame, hangers, track, and soft-close components as a compatible assembly. A stronger roller alone doesn't increase the capacity of a weaker frame.
Tools and materials worth having ready
Gather tools before opening the wall:
- Layout and checking: Tape measure, long spirit level, speed square, chalk line, and stud finder.
- Controlled demolition: Utility knife, pry bar, hammer, and reciprocating saw. Use a circular saw for suitable exposed framing cuts, not blind cuts into a wall.
- Assembly: Drill-driver, appropriate bits, clamps, shims, and the sockets or wrenches needed for hanger adjustment.
- Protection: Eye and hearing protection, dust containment, and a suitable respirator for the materials you're disturbing.
For materials, assemble:
- Door system: Compatible slab, frame kit, track, hangers, stops, floor guide, and optional soft-close hardware.
- Framing: Lumber and structural connectors specified for the opening. Use the kit's split studs rather than substituting full-width studs inside the pocket.
- Operating hardware: An edge pull, passage or privacy latch, and a privacy release that can be operated from outside when needed.
- Finishing supplies: Drywall, approved short fasteners, jamb material, casing, primer, and paint.
Before demolition, make a shallow inspection opening in a location checked for utilities. A stud finder is useful, but it doesn't prove that a cavity is empty.
How to Frame the Pocket and Hang the Track
Framing begins only after you know whether the wall carries a load. Don't remove studs from a potentially load-bearing wall until the structural work, temporary support, and any required approvals have been resolved.
Clear enough wall surface to inspect the connections you're making. Working through a narrow slot might save drywall initially, but it makes accurate fastening and alignment much harder.
Build the opening and pocket
Mark the opening on the floor and transfer it overhead. Include the passage, pocket, and required framing, then identify utilities before cutting and removing the affected studs. This keeps the upper and lower layout aligned rather than creating a twisted pocket.
Set the header on proper supports. Check the surrounding studs for plumb, temporarily secure the assembly, and check the header with a level before completing the fastening. The pocket-door track header isn't automatically a substitute for a structural header carrying building loads.
Install the split studs and jamb spacers. Follow the kit layout and check each member for plumb in both directions. Keep screw points, brackets, and other projections outside the door's travel envelope.
Mount the track straight and level, then locate the floor guide. Support or shim the mounting surfaces where the kit permits, rather than pulling a crooked track into place with screws. Align the guide with the panel path; its job is to control sideways movement, not lift the door or compensate for a sloping track.
This overview shows the framing sequence and the alignment checks that matter before you cover the pocket.

Fit the running hardware and test the assembly
Attach the door plates at the specified setback. Measure from the slab edges rather than estimating the position, and predrill where the slab or hardware instructions require it. The Lowe's pocket-door installation guide documents a system with plates positioned 2 inches from each edge, but that measurement shouldn't be transferred to a different kit.
Insert the rollers in the orientation shown by the manufacturer. Some systems require alternating wheel orientation, so check the diagram before loading the carriages into the track. Fit any concealed stops or soft-close triggers that won't be accessible afterward.
Hang the door and engage the hanger locks. Support the slab while connecting the plates so you don't bend the hardware or damage the door edge. Use a helper for a heavy slab rather than trying to balance it while tightening a connector.
Move the door through its full travel before drywall. Check the top, bottom, and closing-edge gaps with the door at different positions, and pause it partway open to see whether it drifts. Correct rubbing, changing gaps, and latch-edge lean while the framing remains accessible.
A temporary test hang is worth doing even if the kit's normal finishing sequence places final hanging after wall closure. Remove and protect the slab afterward if necessary, and follow the kit's requirements for keeping adjustment points accessible.
A smooth roll at the doorway isn't enough. The door also has to clear the deepest part of the pocket without touching framing or fasteners.
Use the panel as a moving straightedge for the assembly. If the gap changes as it travels, inspect the track, supports, and pocket alignment instead of immediately planing the slab.
Before covering the wall, the frame should be securely supported, the panel should move without scraping, and the closing edge should meet the jamb evenly. The door shouldn't roll by itself when released. Photograph the open pocket and its hardware locations so future repairs don't start with guesswork.
How to Hang the Door and Finish the Drywall and Trim
The door should already have passed its temporary rolling test. Finishing is the stage for setting final reveals and operating hardware, not concealing a frame that still binds.
A reveal is the visible gap between the door and surrounding jamb or trim. Keep it consistent while preserving the clearances required by the hardware.
Set the door and operating hardware
Adjust the hanger height and panel attitude. Set the slab so its closing edge meets the jamb evenly and its bottom clears the planned finished floor. Lock the adjustment nuts or clips afterward so ordinary operation doesn't undo the setting.
Set the travel stops and bumpers. The door should stop without striking the back of the cavity or allowing the leading edge to slam into the jamb. With soft-close hardware, confirm that the trigger engages before the panel reaches its stop.
Fit the pull and latch to the intended user. Use the hardware template and confirm the grip location before cutting the slab. Make sure the edge pull remains reachable when the door is open and that a privacy latch releases reliably from both the inside control and the emergency release.
Don't bury a pull so far that someone has to hook it with a fingernail. Leaving the panel slightly exposed may improve grip, but it also reduces the usable passage, so decide that deliberately.
Close the wall without trapping the hardware
Install drywall with fasteners approved for the pocket frame. Mark the split-stud positions and use fasteners that won't project into the cavity. Preserve the kit's intended service access, which may depend on a removable head jamb or trim piece rather than a permanently open wall panel.
Tape, finish, and sand before setting delicate trim. Protect the track and keep sanding dust out of the rollers. Fit the jambs without squeezing them inward against the slab, then set casing with an even reveal.
Coordinate flooring and final clearances. Install or accurately establish the finished floor before completing the guide and trim adjustments. Keep flooring adhesive, grout, and debris away from the guide, and avoid a raised threshold unless the design requires one.
Paint, allow the finish to cure, and test again. Check the edge pull, latch, stops, and full travel after the protective coverings come off. Remove paint buildup from contact surfaces rather than forcing a sticky door through the opening.
For preparation and coating technique, the Alex Trend Painters door painting guide is a useful companion when you're deciding how to finish the slab cleanly.
Serviceability matters: Make the designated access trim removable. Don't glue over the route needed to disconnect a hanger or remove the panel.
Before the wall closes, label hardware positions on concealed framing and save the photographs with the kit instructions. Those small steps make later adjustment far less disruptive.
Common Installation Mistakes and How to Fix Them
The most consequential buying mistake is selecting a frame from the slab's nominal width alone. Actual mass, thickness, and wall construction determine whether the system can support the door without rubbing or excessive movement.
A heavy slab needs a compatible support package, not just replacement wheels. The Richelieu cavity-slider specifications describe configurations with capacities up to 200 pounds and 500 pounds, and a structural specification requiring at least 1.5 inches of fastener embedment. Those requirements belong to the relevant system; they aren't permission to use long screws through thin pocket members.
Diagnose the symptom before changing parts
Drywall and casing can't straighten a twisted pocket. Tightening trim against the frame can make the opening look neater while reducing the clearance the panel needs.
Use the symptom as a starting point, then verify the suspected cause with a level and a visual inspection.
Pocket door symptoms, likely causes and fixes
| Symptom | Likely cause | Fix |
|---|---|---|
| Door rubs at the top or bottom edge | Header or track not level, or roller height set unevenly | Check the header and track across their full length, correct alignment, and adjust roller height |
| Door rubs along one jamb | Split stud or jamb out of plumb | Re-plumb the affected member, reset jamb spacers, and check hanger adjustment |
| Door rolls open or closed on its own | Track slope; floor slope may also leave the guide misaligned | Level the track and reset the guide to suit the finished floor |
| Latch doesn't line up with the strike | Changing gap caused by panel tilt or a sloped header | Correct track alignment and hanger settings before repositioning the strike |
| Door sags or wobbles | Undersized hardware or weak header support | Install compatible hardware rated for the slab and correct the structural support |
| Door binds when fully open | Wire, pipe, blocking, or a projecting fastener inside the pocket | Remove or properly relocate the obstruction and restore the full travel clearance |
A floor guide doesn't normally cause a top-hung door to roll by itself. Shimming it may correct rubbing near the floor, but it won't cure a sloping track.
Fix the cause rather than its appearance
- An overloaded assembly: Verify the entire frame rating before replacing individual parts. Don't assume a heavier-duty carriage will fit or strengthen the existing track.
- An unstable connection: Check the specified fastener type, substrate, and embedment. Drywall screws aren't substitutes for structural connections.
- An occupied pocket: Have wiring or plumbing rerouted appropriately. Don't push a cable aside and hope the moving panel misses it.
- A displaced jamb: Release the trim pressure and reset the member. Sanding the slab may disguise the symptom while leaving the frame crooked.
Change the verified problem component first, then reassess the gaps. Once the wall is finished, moving a split stud can also mean cutting drywall, removing casing, and repainting.
What Pocket Door Installation Costs and When to Hire a Pro
Whether the wall is open matters more to the budget than the pull finish. Block Renovation reported in 2025 that pocket-door installation costs $500–$1,500 during remodeling with open walls, compared with $1,200–$4,500 or more for a finished-wall retrofit.
The other published figures below describe different project groups. They're budgeting references, not directly comparable quotes for the same East Texas job.
Published budgets and their scope
Pocket door installation cost ranges by source and scenario
| Scenario | Typical cost | Source |
|---|---|---|
| Walls already open during a remodel | $500–$1,500 | Block Renovation, 2025 |
| Retrofit into a finished wall | $1,200–$4,500 or more | Block Renovation, 2025 |
| Average homeowner spend | About $1,050, with a range of $800–$2,500 | HomeAdvisor, 2025 |
| National average | About $1,000, with a range of $500–$3,500 | Angi, 2025 |
| 36-inch door, new construction | $550–$1,850 | Fixr, 2025 |
| 36-inch door, retrofit in an existing wall | $1,550–$2,950 | Fixr, 2025 |
Heavier slabs, better running hardware, utility relocation, and extensive finish repairs increase the scope. Compare estimates that identify demolition, framing, hardware, drywall, trim, paint, disposal, and any required trade work.
The comparison below highlights why wall access changes the job.

Where DIY stops making sense
- Reasonable DIY conditions: An exposed, confirmed non-load-bearing partition, a clear cavity, compatible standard components, and confidence with framing, levels, and shims.
- Professional framing conditions: Uncertain load paths, inadequate header support, unusual wall construction, or a heavy slab that's difficult to handle safely.
- Trade coordination conditions: Wiring, plumbing, ventilation, waterproofing, or required bathroom blocking conflicts with the pocket.
- Finish-sensitive conditions: Existing tile, intricate casing, or difficult wall textures make demolition and restoration a substantial part of the work.
Don't compare a pocket-door quote with an exterior sliding glass door installation as though only the sliding mechanism differs. Exterior openings involve weather protection and a different installation scope.
A professional costs more upfront than doing the labor yourself. Reopening a finished wall to correct a failed installation can erase that saving quickly.
Accessibility Trade-offs and Your Next Step
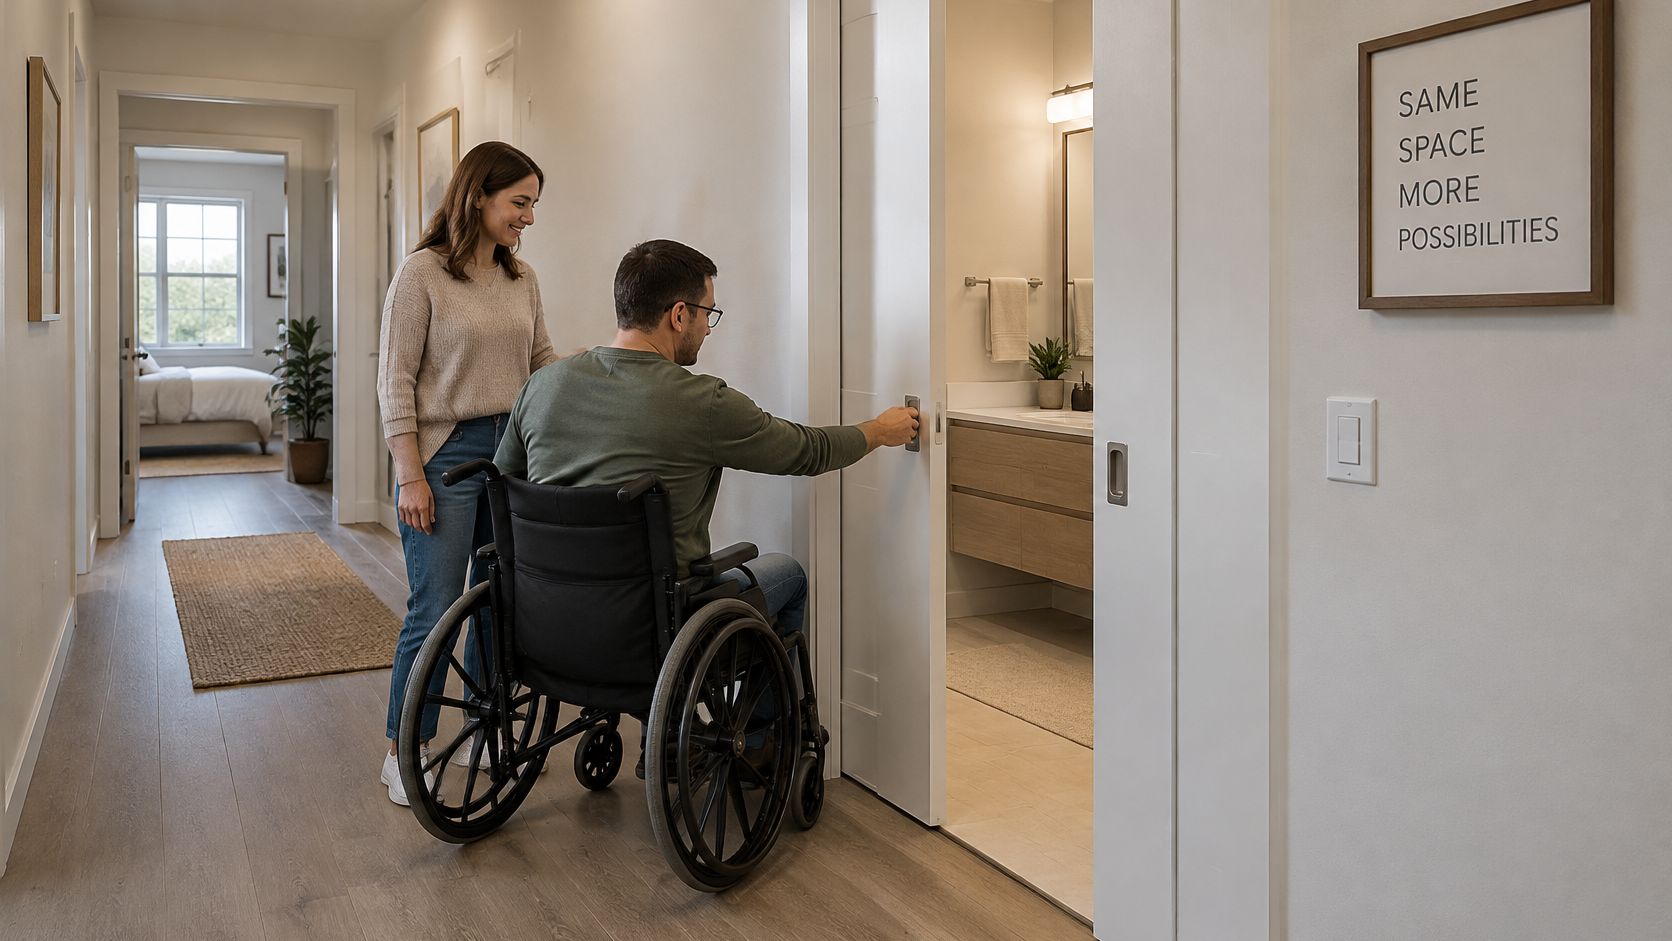
A pocket door saves swing space, but that doesn't automatically make a bathroom easier to use. Someone using a walker or wheelchair still needs an adequate clear passage, room to approach the opening, and hardware they can operate without a tight pinch.
Consider the approach and the reach to the pull, not just the opening in isolation.
Choose for the person using the room
In Houzz's 2025 U.S. Bathroom Trends Study, 68% of homeowners considered special needs in their bathroom projects, up four percentage points year over year, while 47% expected those needs to arise five or more years ahead.
A wider opening and easy-grip hardware may help more than a heavier, more decorative slab. Soft-close hardware can control the final movement, but check the effort required to engage and release it. A conventional outswing door may be the better choice when it provides an easier grip and doesn't obstruct circulation outside the room.
- Test operation: Consider opening force, latch effort, reach, and whether the pull stays accessible.
- Check the whole layout: Include maneuvering space beside the opening and around bathroom fixtures.
- Separate usability from compliance: Aging-in-place planning doesn't replace checking applicable local building and accessibility requirements.
For a bathroom project, coordinate the door with the broader handicap-accessibility remodeling plan, rather than treating it as an isolated upgrade.
Use the following video as a visual companion while considering the door's operation and surrounding space.
The opening and hardware decisions should support the way the household will use the room, not merely make the panel fit inside the wall.
We provide interior and exterior door installation and replacement, and offer free in-home consultations to review your pocket-door scope, opening, and hardware before you order a kit. Visit Home Pro's Remodeling & Repairs, call 903-920-2969, or email homeprostyler@gmail.com to arrange a consultation.