
You've just hung a new fence gate, stepped back to admire it, and noticed the bottom corner is already scraping the ground. The latch takes a shoulder shove, the hinge-side gap looks wider than the latch-side gap, and the gate seems to have developed its own opinion about where level is.
The problem usually isn't the gate. It's the structure holding it.
A gate is a swinging load attached to two posts. If those posts move, lean, or twist, better hinges won't rescue the installation. The following guide treats how to install a fence gate as a footing and alignment job first, then covers the gate, hinges, latch, ground conditions, and safety requirements that determine whether the opening stays usable.
Table of Contents
- Why a Fence Gate Is a Structural Job Before It Is a Carpentry Job
- Picking the Right Gate Style, Material, and Hardware
- Setting the Posts So the Gate Swings True
- Hanging the Gate, Hinges, and Latch
- Slope, Soil, and Freeze-Thaw Adjustments Most Guides Skip
- Safety Codes and When a Gate Stops Being a Simple DIY Build
- Final Checks and When to Call a Pro
Why a Fence Gate Is a Structural Job Before It Is a Carpentry Job

A homeowner can build a square gate, install attractive hardware, and still end up with a failure within the first season. The hinge-side post leans inward, the gate drops toward the latch, and every adjustment becomes a temporary fix. The original mistake happened below grade, where an undersized footing couldn't resist the swinging and lateral loads.
Gate posts carry more stress than ordinary line posts because the gate hangs from them and repeatedly transfers force through the hinges. Installation guidance commonly recommends burying fence posts about one-third of their total length, while gate posts are often set 6 to 8 inches deeper than standard posts and anchored in concrete. A 6-foot fence may call for gate-post holes around 42 to 46 inches deep, depending on the system and local frost conditions, as described in fence post depth guidance.
The weak points are predictable
Most troublesome gates trace back to a short list:
- Shallow holes: The post shifts instead of holding the gate's load.
- Narrow footings: A small concrete collar gives the post less resistance against rotation.
- Poor bracing: Fresh concrete can't hold a post plumb if the post moves while the mix cures.
- Hardware-first planning: Heavy hinges get selected before anyone accounts for post size, gate weight, or ground clearance.
Code-oriented construction guidance treats the one-third rule, local frost depth, and local building requirements as competing minimums, with the deepest applicable requirement controlling. Some specifications also call for gate, corner, end, and pull posts to extend 48 inches into grade, which is why a gate footing deserves more attention than a typical fence hole. See the structural fence installation reference before choosing a depth from a generic chart.
Practical rule: If the post can move, the gate will eventually move with it.
The rest of the job follows from that principle. You'll lay out the opening, choose hardware that matches the gate's weight, set and brace both posts, respect curing time, then hang and adjust the gate. If the opening is part of a driveway, security system, or high-traffic property, it's sensible to find local security gate installers rather than treating a heavily loaded gate like a small carpentry project.
Picking the Right Gate Style, Material, and Hardware
A gate that looks simple can put a surprising load on its hinge-side post. Choose the opening and material together, then select hardware that matches the finished gate, not an optimistic estimate made before assembly.
Start by deciding whether the gate should swing inward or outward, whether a single leaf is practical, and how much clearance it needs over a sloped walkway, planting bed, driveway, or snow bank. A double gate spreads the load between two leaves, but its meeting line must remain aligned. It also needs a reliable drop rod or other device to hold one leaf in place.
Material changes the load and the maintenance work. A framed cedar or pressure-treated pine gate suits many residential fences, while a solid wood panel can become heavy enough to bend light-duty hinges. Welded steel is rigid and secure, but it needs substantial posts and corrosion protection. Aluminum keeps a metal appearance with less weight. Vinyl and composite kits reduce routine upkeep, though proprietary brackets and replacement parts can restrict hardware choices. Use this fence staining and sealing guide to plan the maintenance required by a wood gate or other exterior material.
Gate use matters as much as gate size. A roughly 3-foot pedestrian gate has different loading and clearance needs from a roughly 6-foot drive gate. Estimate the actual weight, account for how often the gate will cycle, and choose hinges and latches after that assessment.
Residential Gate Material and Hardware Decision Matrix
| Material | Weight Class | Recommended Post | Hinge Type | Cost Range |
|---|---|---|---|---|
| Framed cedar or pressure-treated wood | Light to medium | 4x4 for light gates, larger hinge-side post for heavier panels | Spring hinges or adjustable strap hinges | Varies by size and hardware |
| Welded steel | Medium to heavy | Substantial treated wood, steel, or masonry-supported post | Ball-bearing or heavy-duty adjustable hinges | Varies by fabrication and hardware |
| Aluminum | Light to medium | Sized to the frame and opening | Adjustable aluminum-compatible hinges | Varies by frame and finish |
| Vinyl or composite kit | Light to medium | Manufacturer-specified reinforced post | Kit hinges or compatible adjustable hinges | Varies by kit and accessories |
Light wood gates can use self-closing spring hinges with a gravity latch when the opening has modest traffic and security demands. Heavier steel, wide wood, or frequently used gates require stronger adjustable or ball-bearing hinges. Add a keyed latch or drop rod when the opening needs positive security.
The gate determines the load. The load determines the posts. The posts determine which hardware can stay aligned over time. Choose the complete system before buying the latch.
Setting the Posts So the Gate Swings True
A gate can be built perfectly and still fail if its posts move. Before digging, check your municipality's rules for gate height, setback, visibility, and permits. If the opening is near utilities, contact the applicable utility-marking service first. Confirm that the gate will not cross an easement, block a sightline, or violate a local requirement.
Lay out the opening carefully
Drive stakes on both sides of the planned opening and run a string line along the fence. Measure the gate itself, then set the rough opening from the actual hinge and latch requirements. Industry-style instructions commonly allow a single gate opening to be about 1 inch wider than the gate, while other guidance calls for holes roughly 3 to 4 inches wider than the gate on center, with room for the hardware. For a prebuilt gate, use the manufacturer's opening dimension.
Mark the hinge-side post first. It carries the concentrated load and needs the most careful placement, alignment, and bracing. Dig to the deeper of the local frost depth or 24 inches, then account for the gate system, soil, and local requirements. Field guidance commonly places gate supports or terminal posts at 30 to 36 inches minimum depth. Cold-climate footings may require 36 to 48 inches or more where the frost line demands it.
Set, brace, and align
Where soil conditions allow, bell out the bottom of each hole. The wider base helps the concrete resist movement and uplift. Set the hinge-side post, check it with a level on two adjacent faces, and brace it in both directions with stakes and temporary lumber.
Pour stiff concrete around the post while keeping it centered and plumb. Finish the top of the footing slightly below or near grade as drainage and finish work require. A raised mound can hold water against the post. Concrete will not reliably straighten a post that was leaning during the pour, so correct the alignment before the mix sets.
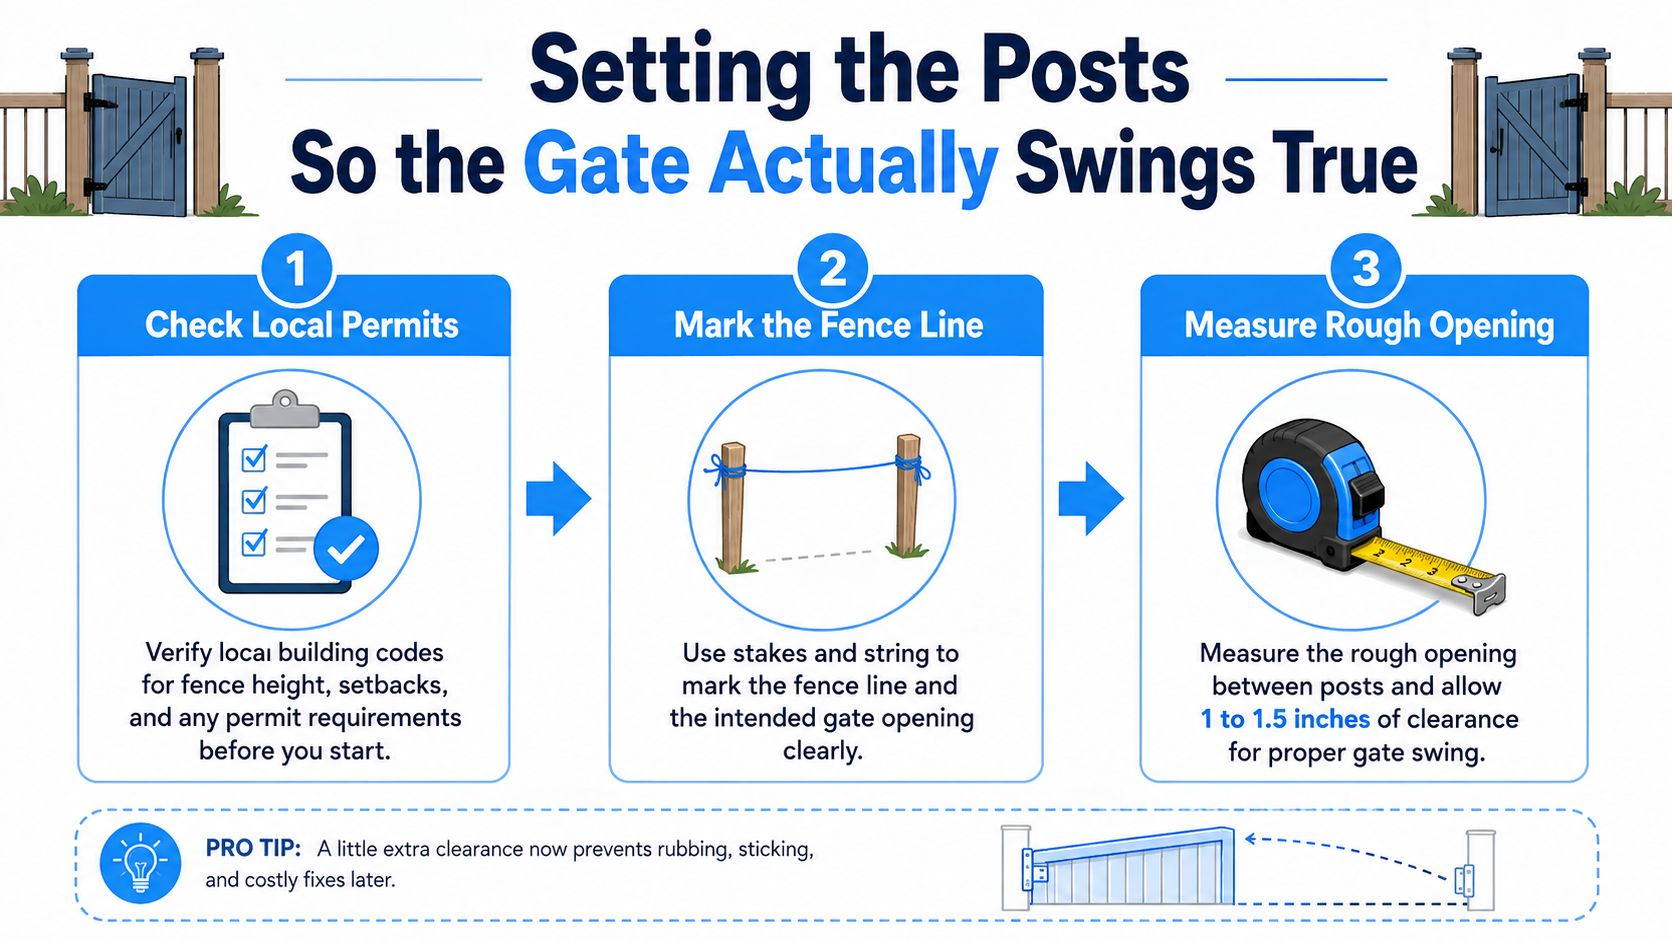
After the hinge post is stable, position the latch post against the string line. Use a temporary cross-brace between the posts, or a measured string line, to keep their faces parallel. Measure the distance at the top, middle, and bottom. Unequal measurements indicate a twisted or out-of-square opening. The gate might rest acceptably in that position, then bind as it swings.
Use this sequence:
- Stake the opening: Confirm the fence line, swing direction, and surrounding clearance.
- Dig for the site: Follow the frost line or applicable structural depth, using whichever requires more depth.
- Set the hinge post: Plumb it in two directions and brace it before pouring concrete.
- Set the latch post: Match the hinge post's alignment and preserve the measured opening.
- Wait for cure: Follow the concrete-bag instructions before loading either post. A DIY installation guide recommends 48 to 72 hours before hanging a gate, while other instructions specify at least 24 to 48 hours. Product directions and site conditions should control. The gate installation instructions also show why bracing and sequencing matter.
Do not hang the gate because the concrete feels hard at the surface. The hinge load twists the post, and an early installation can permanently shift the footing or leave the opening out of alignment.
Hanging the Gate, Hinges, and Latch
A gate should pass a simple push test before you hang it. Push the hinge-side post firmly in both directions. If you can see or feel movement, leave the braces in place and give the concrete more time. Hanging the gate early can shift the post permanently, turning a correct layout into a crooked opening.
Lay the gate flat on sawhorses. Attach the hinges to the gate frame or horizontal rails, placing them as far apart as the design allows. A common practical location is about 8 to 10 inches from the top and bottom corners. Predrill holes for lag screws, especially in cedar, pressure-treated lumber, or narrow rails, because forcing a large fastener into dry wood can split the frame.
Support the gate during installation
Place shims under the gate to create about 2 inches of ground clearance. That space gives the bottom rail room to clear ordinary debris, seasonal surface changes, and uneven ground. A practical installation benchmark also allows approximately 1/2 to 3/4 inch of latch-side clearance, with the final gap adjusted for the slope and gate design. The fence gate installation guide covers these clearance and curing considerations.
Lift the supported gate into the opening and mark the hinge locations on the hinge post. Predrill the post, attach the post-side straps or plates, then seat the gate-side hinge components and tighten the fasteners. Keep a level across the top rail and check the hinge-side stile for plumb before fully tightening everything. A frame that's slightly racked at this stage can become a sagging rectangle once the hardware takes the full load.

Set the latch only after the gate swings freely. Position it to match the adjacent fence and make sure the bolt or latch tongue meets the strike without lifting, pushing, or twisting the gate. Test the swing repeatedly in both directions, listening for a scrape and watching the bottom gap across the full arc.
For a gate connected to a broader entry system, the mechanical latch may eventually need to coordinate with an access-control or smart-lock setup. In that situation, get smart home lock integration help before drilling extra holes or mixing incompatible hardware.
Heavy gates also need anti-sag support. A diagonal brace or turnbuckle cable keeps the frame square under load, while adjustable hinges let you correct minor movement without rebuilding the opening. Hardware can fine-tune alignment, but it can't compensate for a post that was set shallow or left unbraced.
Slope, Soil, and Freeze-Thaw Adjustments Most Guides Skip
A level gate installed on level ground is the easy case. Sloped ground changes the swing arc, and moving soil changes the post position. If you ignore both, the gate may work during installation and drag after rain, frost, or seasonal drying.
On a slope, plan the swing toward the higher side when the site allows it. Gravity can help the gate settle toward the latch instead of pulling it away, but the bottom rail still needs to follow the ground relationship without scraping. For a steep grade, a stepped fence layout, a shorter gate leaf, or a double-leaf arrangement may work better than forcing one large panel through an impossible arc.
Match the footing to the soil
Soft or sandy soil needs more resistance than compact, stable soil. Bell the bottom of the hole where practical so the concrete forms a mechanical key against uplift and rotation. Clay requires a different response because it retains water and can swell, shrink, and move posts as conditions change.
Keep roof runoff, sprinkler spray, and irrigation discharge away from the footings. Chronic saturation often causes more trouble than a single wet day, especially where the concrete collar traps water around wood. Gravel near the upper portion of the hole can help shed surface moisture, provided the footing design and local practice support it.
| Site Condition | Footing Adjustment | Clearance / Drainage Tip |
|---|---|---|
| Sloped ground | Align posts to the planned swing and consider a stepped or split gate layout | Preserve the intended bottom gap through the full swing arc |
| Soft or sandy soil | Use a deeper, bell-bottomed footing where site conditions require it | Keep loose surface soil and standing water away from the post |
| Expansive clay | Improve drainage and avoid relying on a narrow concrete collar | Use gravel near the top where appropriate to direct water away |
| Freeze-thaw climate | Extend the footing below the local frost line, which may require 36 to 48 inches or more in northern regions, according to cold-climate fence guidance | Check downspouts and irrigation so water doesn't collect at the post |
| Uneven finished grade | Adjust the lower rail or choose a gate configuration suited to the grade | Measure clearance at several points, not only at the latch |
Frost can lift a footing or move a post sideways when the surrounding soil freezes and expands. A footing below the local frost line reduces that risk, but drainage and post alignment still matter. Recheck the latch and bottom gap after the first significant seasonal change instead of assuming one installation-day adjustment will last.
Safety Codes and When a Gate Stops Being a Simple DIY Build
A gate becomes more than a backyard carpentry project when it protects a pool, serves an egress route, controls vehicles, or forms part of an automatic or high-traffic entry. Local rules can govern the swing direction, latch behavior, opening, height, and maintenance. Requirements vary by jurisdiction, so verify them before buying hardware.
Pool barriers deserve special caution. Requirements commonly include self-closing hinges and a latch that can't be released from the protected side, with the release mechanism at least 54 inches above grade in the guidance described in the project brief. A gate that looks secure but fails those details can create a serious safety problem and fail inspection.
Side-yard gates can also conflict with emergency access. A homeowner may want a gate to swing into the yard, while local egress rules or the site layout may require a different direction. Utility easements, homeowners association sightline rules, and corner-lot visibility restrictions can affect placement before the first post hole is dug.
Code check: Call the municipality before you choose the latch. Hardware is cheap to replace compared with a finished gate that must be rebuilt.
For chain-link work, ASTM F567 remains a core installation standard that includes gate-related practices. Commercial, automatic, and high-traffic gates may also require documented inspections, self-closing operation, anti-entrapment measures, or maintenance procedures. Recent industry coverage discusses ICC-approved 2027 model-code updates that expand swing- and sliding-gate safety and maintenance expectations, but local adoption controls what applies to your project. Review chain link fence costs and contracts when comparing a basic residential opening with a contracted fence and gate scope, and check local requirements through these fence permit resources.
Final Checks and When to Call a Pro
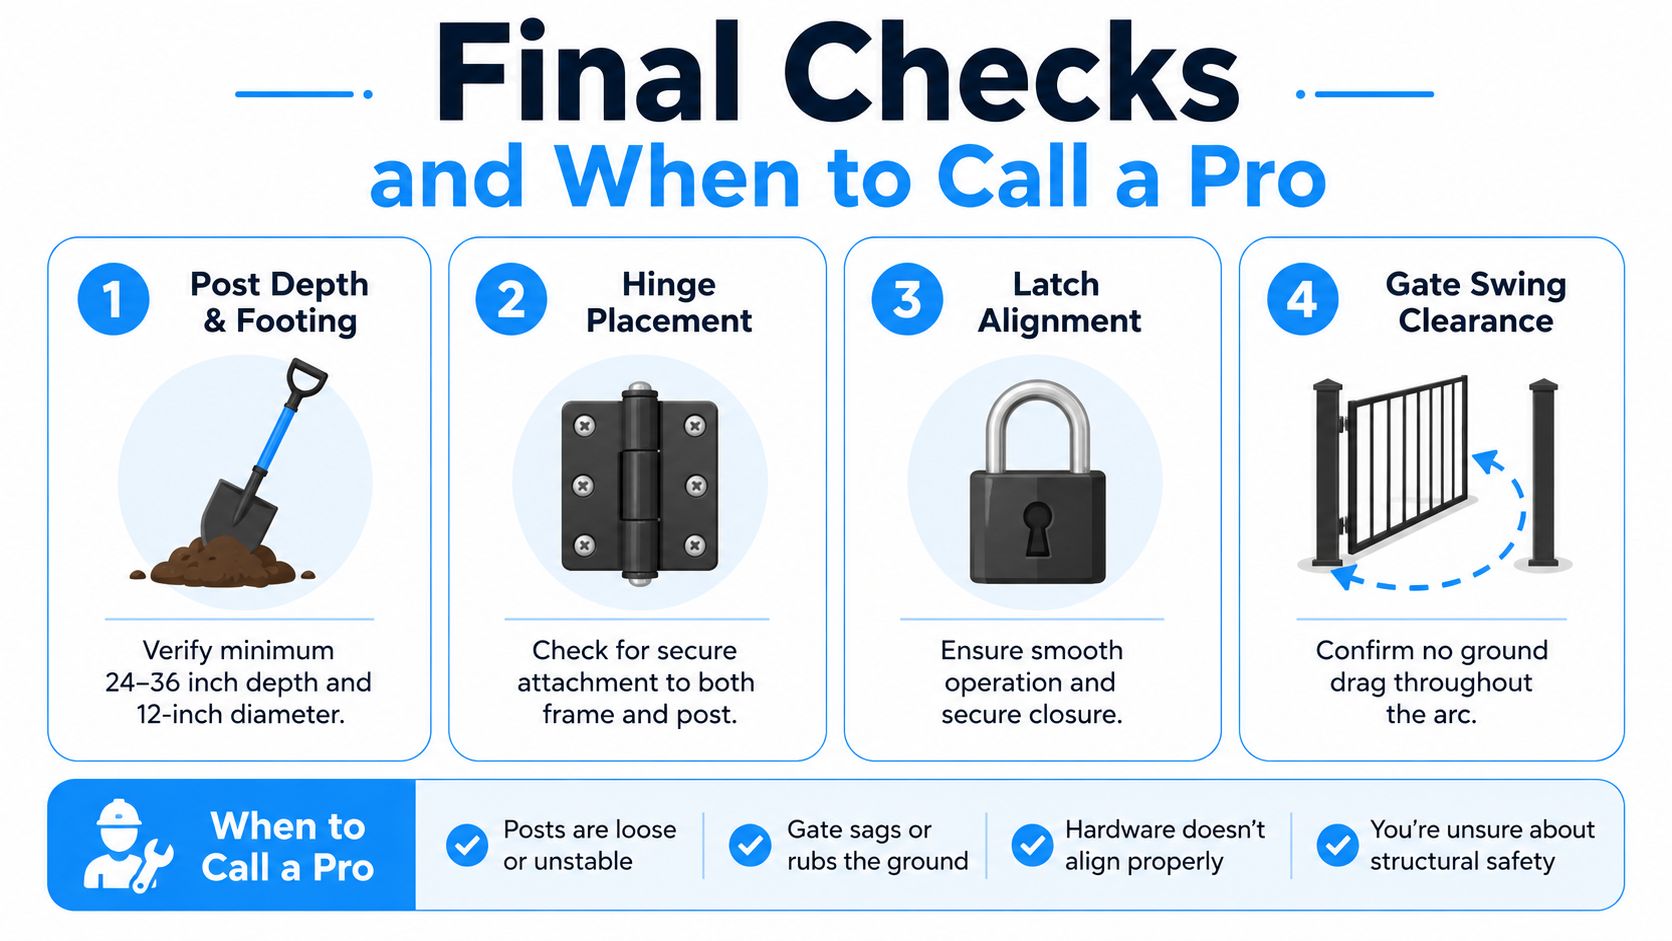
A gate that looks square from the street can still fail its working tests. The important checks are structural and functional: the posts stay fixed, the hinges carry the load without twisting, the latch meets cleanly, and the bottom gap remains usable across the full swing.
Use a practical closeout checklist
- Push the posts: Confirm neither post shifts under firm hand pressure.
- Check the hinge line: Make sure fasteners are tight and the gate-side hinges sit square on the frame.
- Run the swing test: Open and close the gate repeatedly in both directions, watching for ground drag.
- Inspect the latch: The latch should engage without lifting, pulling, or slamming the gate.
- Measure the gaps: Look for a consistent bottom relationship, especially across a slope.
- Recheck after cure: Inspect the opening again after the concrete has completed its product-directed cure period.
Call a professional when the site includes a major grade change, a double-drive or cantilever arrangement, soft or expansive soils, existing masonry columns, or frost conditions that demand unusually deep footings. Pool-code latch requirements also justify professional review because a small hardware error can create a safety and inspection failure.
For homeowners who want an installer rather than another weekend of adjustment, fencing contractors near you can assess the posts, gate weight, ground conditions, and code issues together. Home Pro's Remodeling & Repairs provides fence and gate installation and repair as part of its exterior remodeling services, with on-site consultations available in Tyler and surrounding East Texas communities. Visit Home Pro's Remodeling & Repairs to request an assessment for a gate that needs sound footing work, accurate alignment, or a complete fence-and-gate installation.