
You're standing in the kitchen looking at tired cabinet doors, a drawer that won't close properly, and hardware you stopped liking years ago. You want a change, but you don't want a demolition crew or a renovation bill that takes over your finances. Before you buy paint, find out whether those cabinets need a better finish, better parts, or an actual replacement.
Table of Contents
- Why Your Cabinets Are the Best Place to Start
- Inspect Your Cabinets Before You Pick a Method
- Paint, Reface, or Replace the Honest Comparison
- The Painting Workflow That Actually Holds Up
- High-Impact Upgrades That Cost Almost Nothing
- When Painting Is the Wrong Budget Solution
- Build Your Phased Budget Plan and Know When to Call a Pro
Why Your Cabinets Are the Best Place to Start
An outdated kitchen isn't automatically a worn-out kitchen. If the storage works and the cabinet boxes are solid, tearing everything out means paying to replace components you could keep. My recommendation is to separate what bothers you visually from what's broken.
Say you like where the sink and stove sit, but dislike the dark doors and dated handles. That's a different project from a kitchen with crumbling sink cabinets and drawers that block the dishwasher. Treating both kitchens as full replacements wastes money on the former. Treating both as paint projects wastes money on the latter.
Keep the Useful Parts
Cabinets deserve attention because they account for a substantial part of remodeling spending. A cabinet-update cost overview citing Architectural Digest places new cabinets and shelving at approximately 20%–40% of a kitchen renovation budget. That's a good reason to investigate keeping serviceable components before shopping for replacements.
A cabinet-first plan directs your money toward specific results:
- Keep the footprint: Don't move appliances or plumbing merely to make the room look different.
- Preserve sound boxes: Spend on visible surfaces rather than replacing hidden structure without a reason.
- Separate appearance from function: A new finish changes the look. Hardware repairs address how the cabinets operate.
Understand What You're Buying
Refinishing changes the existing finish. Painting covers it with an opaque coating. Refacing keeps the boxes while replacing or covering doors, drawer fronts, and exposed surfaces, as described in USA Cabinet Express's refacing guide. Replacement removes the cabinets themselves.
Those aren't interchangeable services, so don't compare quotes by their bottom line alone. A paint estimate and a refacing estimate purchase different materials and different amounts of labor.
Budget rule: Keep a component because it's useful and sound, not simply because keeping it produces the lowest initial quote.
That's the starting point for deciding how to update kitchen cabinets on a budget: preserve value before you purchase a new look.
Inspect Your Cabinets Before You Pick a Method
Open every door and empty the questionable cabinets. You need to see the interiors, edges, undersides, and hardware attachment points, not just the faces you notice while making coffee.
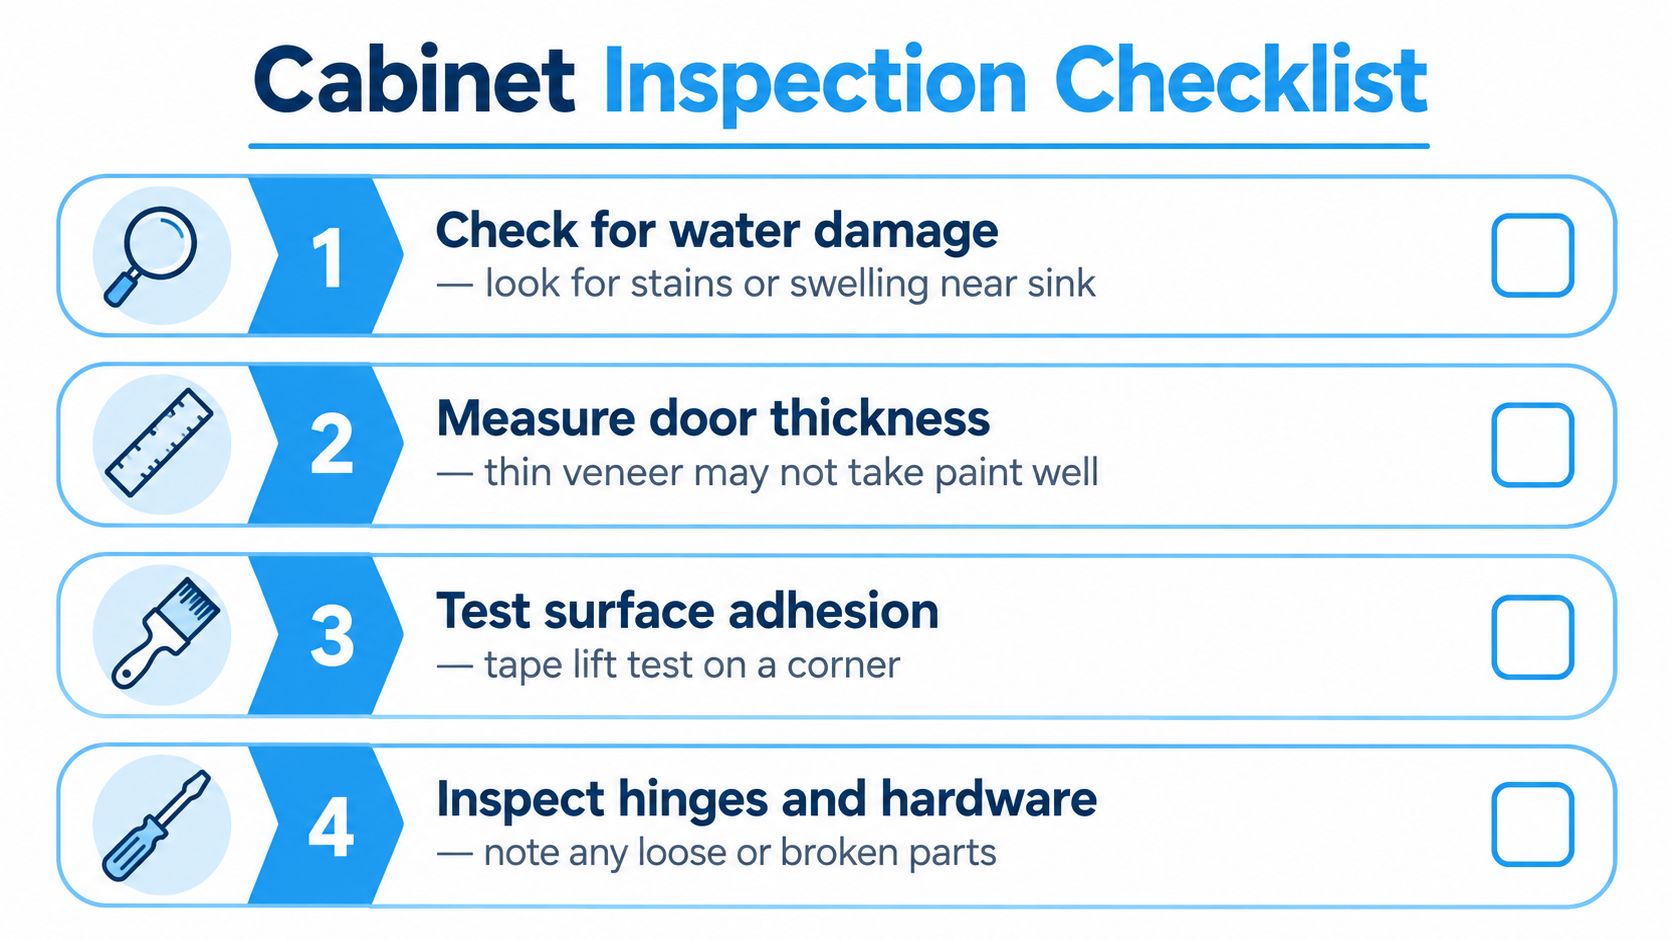
Use this checklist to organize the inspection, then record your findings by cabinet location.
Look Beyond the Door Face
- Start near water: Inspect beneath the sink and beside the dishwasher. Look for staining, swollen edges, soft material, and separated layers. Don't schedule cosmetic work over an unresolved moisture problem.
- Check doors and edges: Identify solid wood, veneered panels, laminate, or wrapped fronts. Note thickness and construction, but don't treat thickness alone as proof that a door will accept paint.
- Inspect the existing surface: Record peeling, bubbling, chips, and exposed substrate. A corner tape check can reveal loose material, but it doesn't replace testing the proposed coating system.
- Examine hardware attachment: Open doors slowly and watch the hinges. Distinguish a loose screw from a damaged hole that can no longer hold the hardware securely.
Make a Cabinet-by-Cabinet Map
Use painter's tape and a notepad to identify each location. Write down whether the issue belongs to the finish, front, hardware, or box. A damaged door shouldn't automatically condemn the cabinet behind it.
Stand back and assess the layout, too. Can you reach what you need? Do doors interfere with appliances? Would you still dislike using the kitchen after every surface looked new?
Give your contractor that map rather than asking for an undifferentiated cabinet makeover. Ask for written findings on questionable boxes and a separate price for repairing or replacing them. You'll have a clearer basis for deciding what to keep, and you won't bury structural work inside a cosmetic allowance.
Paint, Reface, or Replace the Honest Comparison
Choose the least extensive method that solves the actual problem. Painting wins when you need a finish change. Refacing earns its higher price when you need different fronts. Replacement makes sense when you need different cabinets, not merely a different color.
The professional painting and refacing benchmarks below come from the cabinet-painting and substrate decision guide. They're planning ranges, not a quote for your kitchen.
Budget Cabinet Update Paths Compared
| Method | Typical Cost Range | Best For | Watch Out For |
|---|---|---|---|
| Professional painting | Approximately $2,000–$6,500 | Serviceable cabinets needing a color change | Preparation, adhesion, and curing requirements |
| Refacing | Approximately $4,000–$13,000 | Sound boxes with fronts or exterior surfaces worth changing | Paying to cover boxes that should be replaced |
| Full replacement | Requires a project-specific estimate | Failed boxes or a layout that needs correction | Comparing cabinet-only pricing with installed project pricing |
For refinishing, ask the contractor whether the scope means renewing a clear finish, staining, or painting. Those labels get used loosely. Your estimate should identify the preparation, coating, repair work, and installation included.
Compare the Ownership Cost
Don't judge durability solely by whether a finish was applied in a factory or in your house. Product selection, preparation, use, and maintenance all belong in the conversation.
As a broad planning reference, Gilmer Kitchens' cabinet-finish guidance describes factory-cured finishes lasting roughly 15–20 years, while site-painted finishes may need touch-ups in about 3–5 years under demanding use. Those aren't warranties or promises for your cabinets.
The economical choice is the one you can live with and maintain, not necessarily the cheapest proposal to sign.
For a homeowner preparing to sell, I'd favor restrained cosmetic work over highly personal customization. An investor handling a make-ready should prioritize dependable operation and finishes that can be maintained. A family staying put should give more weight to repeated daily use.
Ask each bidder to identify removal labor, preparation, materials, installation, and expected kitchen access. Don't accept a precise downtime promise that ignores the selected coating's cure requirements.
The Painting Workflow That Actually Holds Up
A cabinet paint job is mostly preparation with a visible finish at the end. If your plan starts with rolling paint onto greasy doors while they're still hanging, stop and rewrite the plan.
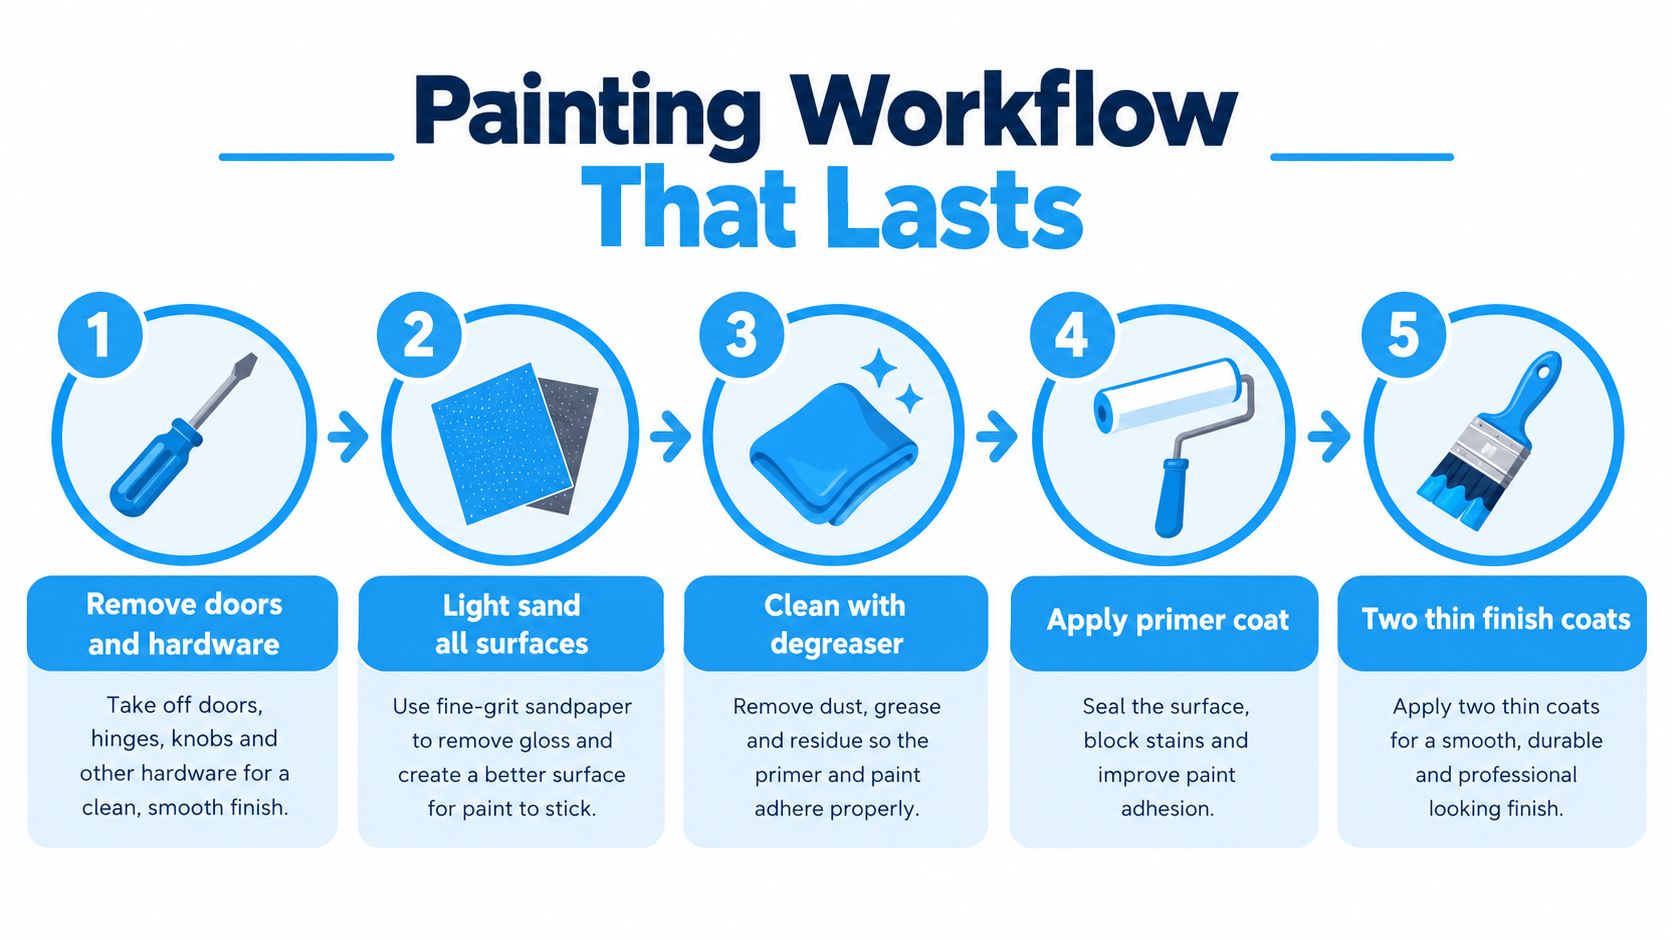
The overview below is useful, but degrease before scuff-sanding. Don't follow a simplified graphic at the expense of the written coating instructions.
Prepare Before You Coat
- Remove and label components. Take off doors, drawer fronts, pulls, and hinges. Mark locations and keep hardware in labeled bags so reassembly doesn't become guesswork.
- Degrease thoroughly. Clean handle areas, cooking residue, corners, and profiles. Follow the cleaner's directions for removing residue before moving on.
- Scuff and repair. Dull glossy coatings, repair chips and dents, then vacuum and tack-clean. You're preparing a sound surface, not trying to erase structural damage with filler.
- Test the complete system. Use an inconspicuous door to test the intended preparation, bonding primer, and finish together.
- Prime and finish carefully. Apply bonding primer, then two thin finish coats, respecting the manufacturer's recoat interval, as outlined in the controlled cabinet-refinishing workflow.
Keep the doors flat during coating. Heavy coats aren't a shortcut to coverage; they create another problem to correct.
Treat Curing as Part of the Job
Dry to the touch doesn't mean ready for hardware or daily use. Follow the coating manufacturer's full cure instructions before reinstalling hardware and returning the cabinets to service.
Set aside a clean working area and plan where the doors will remain while curing. Don't improvise that space after the primer is already on.
If you hire the work out, ask which cleaner, primer, and topcoat the painter intends to use. Request a sample door before approving the entire kitchen. A written coating specification gives you something concrete to evaluate beyond a color chip.
High-Impact Upgrades That Cost Almost Nothing
“Almost nothing” should mean small scope, not a promise that every accessory is cheap. There's no useful universal price for a pull, rollout, or lighting installation without knowing the product, quantity, and labor involved. Get those costs itemized instead of accepting a vague accessories allowance.

Spend on the Annoyance First
My order is straightforward: fix what doesn't work, change what you touch, then improve what you see. That keeps decorative purchases from consuming money needed for basic repairs.
- Pulls and knobs: Compare samples against the actual door finish. Measure existing hole spacing before ordering so you know whether filling and drilling belong in the scope.
- Hinges and drawer slides: Ask the installer to verify compatibility and attachment condition before you buy soft-close replacements.
- Rollouts: Choose them for storage you struggle to reach, not because every base cabinet needs an accessory.
- Under-cabinet lighting: Include the power arrangement and installation in the quote, not just the fixture price.
For help narrowing decorative choices, you can browse cabinet finishing ideas for DIYers from Neasden Hardware. Use the ideas to develop a shortlist, then test samples in your kitchen.
Keep Decorative Changes Selective
I'd put glass inserts and open shelving behind functional repairs. Choose them because you want to display what's inside, not because removing doors sounds like a free makeover. Ask the contractor what finishing or carpentry the change requires before approving it.
Lay cabinet, countertop, backsplash, and hardware samples together before purchasing anything. These kitchen remodel ideas can help you coordinate the broader room without turning a cabinet refresh into unrelated projects.
Don't assign a resale return to individual handles or lighting fixtures. Buy functional improvements for daily use and choose restrained finishes if selling is your priority.
When Painting Is the Wrong Budget Solution
Paint can change a surface. It can't repair the material underneath it. When loose finishes fail on damaged material, a cheap cabinet makeover can become an expensive repeat project.
The material distinction matters. Intact laminate may be a candidate after appropriate cleaning, scuffing, and bonding primer. Bubbling thermofoil is different: paint won't restore the failing bond between the vinyl covering and the underlying MDF.
Test Laminate, Don't Assume
Choose a concealed laminate area that represents the cabinets you want to paint. Prepare it with the proposed cleaner, abrasion method, primer, and topcoat. Let that complete system cure according to its instructions before evaluating adhesion.
Don't approve the whole kitchen because the primer looked good when wet. If the test coating releases, stop and reassess the system rather than buying more paint.
A successful sample is permission to proceed carefully. A failed sample is a reason to change the plan.
For an East Texas kitchen, pay particular attention to cabinets with different exposure histories. A dry pantry cabinet and a front beside the oven shouldn't automatically receive the same treatment just because they match.
Replace the Failure, Not Everything Around It
- Peeling thermofoil: Price replacement fronts or selective refacing rather than coating loose vinyl.
- Swollen MDF: Have the affected component evaluated for replacement. Don't mistake a smooth patch for restored material.
- Damaged hinge bores: Require a reliable attachment repair or a replacement component before specifying new hardware.
- Heat or moisture exposure: Address the cause before approving a cosmetic repair.
The earlier inspection and ownership comparison should guide the decision. If the boxes remain serviceable but selected fronts don't, ask for a mixed scope rather than forcing the whole kitchen into a paint-only proposal.
Review these kitchen-remodel mistakes to avoid before committing to work that merely hides the problem. My decision rule is simple: paint sound material, replace failing fronts, and replace boxes only when their condition or function justifies it.
Build Your Phased Budget Plan and Know When to Call a Pro
Set your spending limit before selecting finishes. Then ask contractors to price the work against that limit, with essential repairs separated from optional upgrades. A target budget is useful only if you're willing to leave attractive extras out.
Build an Estimate You Can Act On
Use your inspection notes to request distinct scopes: a cosmetic refresh, selective component replacement, and cabinet replacement where warranted. Ask the contractor to explain what each option leaves unresolved.
Organize the estimate around purchases and tasks:
- Condition and repairs: Document the components to retain, repair, or remove.
- Finish work: Identify preparation, coating products, sample approval, and curing requirements.
- Replacement components: Specify fronts, exposed surfaces, and installation.
- Functional upgrades: Separate hardware, storage accessories, and lighting.
- Project logistics: Include protection, removal, cleanup, and kitchen access.
Start with corrective work. Complete the selected cabinet treatment next, then add optional accessories when the budget allows. Don't buy decorative hardware before confirming the door and drawer plan.
Use this kitchen remodeling cost guide to frame the larger budget discussion. Keep cabinet work distinct from countertops, flooring, and appliances so you can see which decisions expand the project.
Check Older Paint Before Disturbing It
For U.S. housing built before 1978, paid renovation that disturbs painted surfaces generally falls under the EPA Renovation, Repair and Painting rule. Covered contractors must be certified and use trained workers and lead-safe practices; affected paint must be appropriately tested or treated as lead-containing when it hasn't been documented as lead-free.
Don't begin uncontrolled scraping or dry sanding while you sort that out. Remove food and textiles, keep occupants away from the work area, and have the contractor explain containment and cleanup before work starts.
Know When the Job Needs Professional Eyes
Call a remodeler when you find uncertain structural damage, widespread material failure, unreliable hardware attachment, or a layout problem that cosmetic work won't resolve. Bring in an appropriately qualified professional for lead-related questions and relevant trades for electrical or plumbing changes.
Compare written scopes, not verbal assurances. Ask what happens if removal reveals additional damage, who approves that work, and how it changes the price. The right budget plan lets you make those decisions deliberately instead of paying for them under pressure.
For an on-site assessment of what to keep, repair, or replace, visit Home Pro's Remodeling & Repairs, a licensed and insured contractor serving Tyler and East Texas. The team offers kitchen remodeling, cabinet upgrades, free onsite estimates, and same-day quotes, so you can discuss a cabinet-first scope against your target budget before committing to the work.